
领先的开源 AI 代码助手——Continue自定义配置使用 Opneai GPT模型 或 Claude 3.5 模型进行 AI 开发
本教程将指导您如何在 Visual Studio Code (VSCode) 中安装和自定义配置 Continue 插件,并使用 Claude 3.5 模型进行 AI 开发。
简介
本教程将指导您如何在 Visual Studio Code (VSCode) 中安装和自定义配置 Continue 插件,并使用 Claude 3.5 模型进行 AI 开发。通过本教程,您将能够高效地利用 AI 助手提升开发效率。(本方法访问所有大模型均无需梯子)
重点注意事项
重点:无论是用 Openai GPT系列模型还是 Claude系列模型或其他任何模型,均只需修改Continue的config.json配置文件即可!!
API KEY: 在大模型API平台 CURSOR API 令牌页面新建获得。例:sk-1Qpxob9KYXq6b6oCypgyxjFwuiA817KfPAHo8XET7HjWQqU
Base URL: https://api.cursorai.art/v1/
主流模型全称:claude-3-5-sonnet-20241022、claude-3-5-sonnet-20240620、gpt-4o、gpt-4o-mini
所需工具与前提条件
- 安装了最新版本的 Visual Studio Code
- 网络连接,用于下载插件(访问所有大模型均无需梯子)
- 拥有 Claude 3.5 模型的 API 密钥
- 基本的编程知识,建议熟悉 JavaScript 或 Python
详细步骤指南
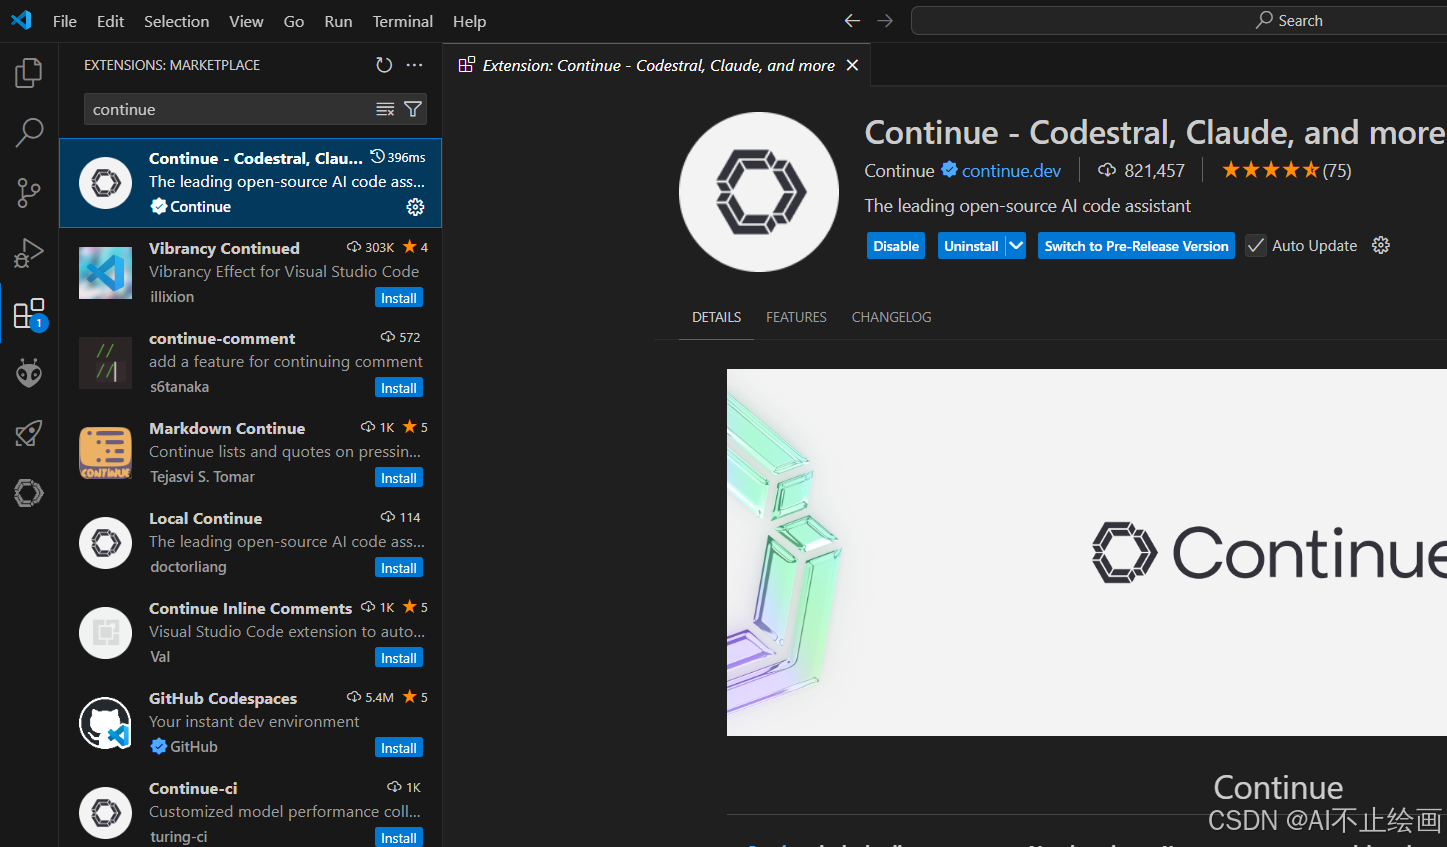
1. 安装 Continue 插件
打开 VSCode,进入扩展市场(快捷键 Ctrl+Shift+X),搜索 “Continue”,然后点击安装。
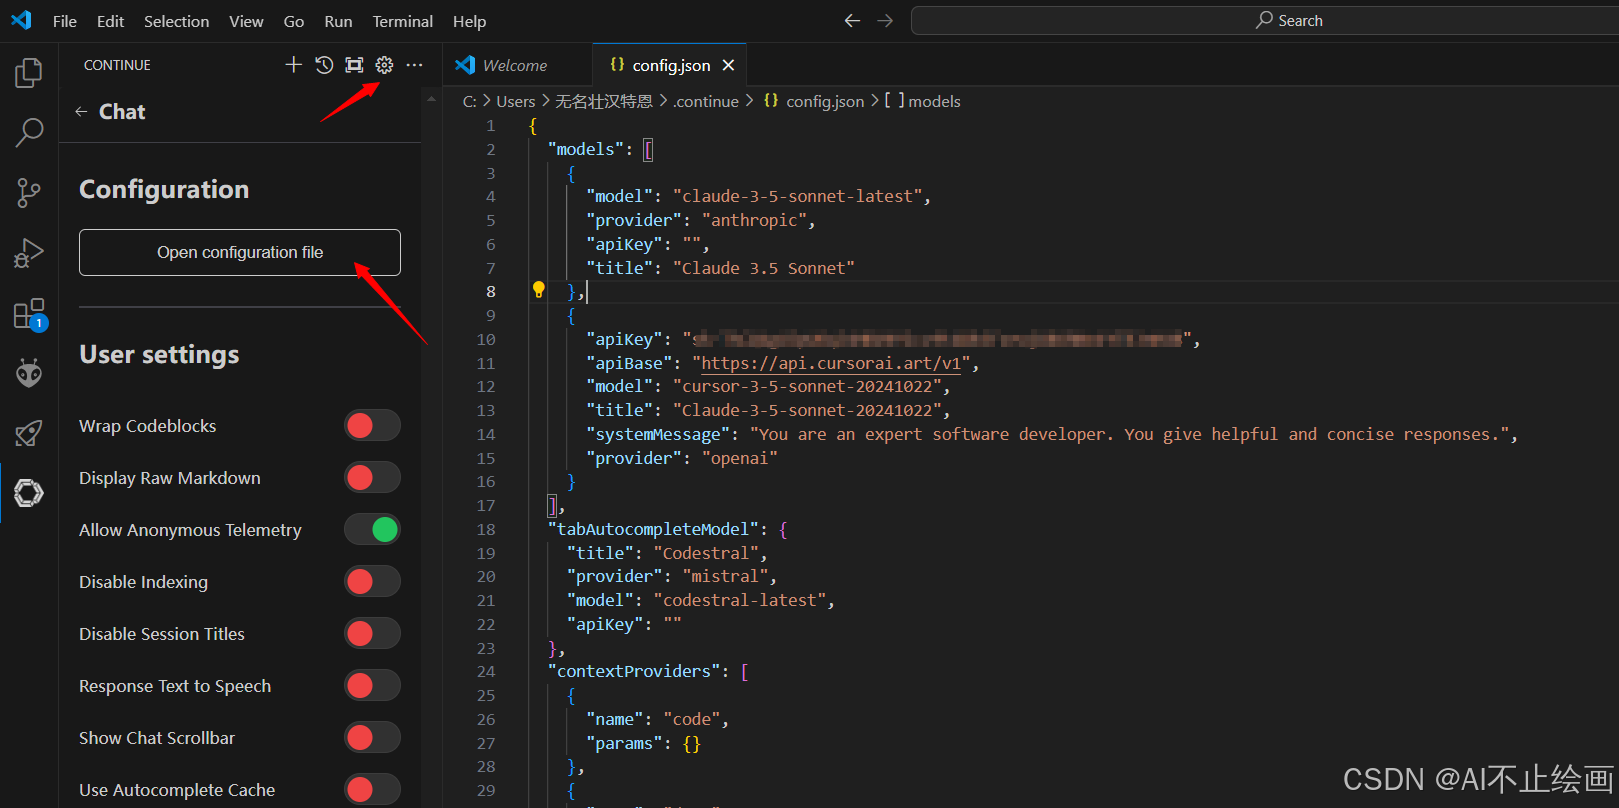
2. 配置 Claude 3.5 模型
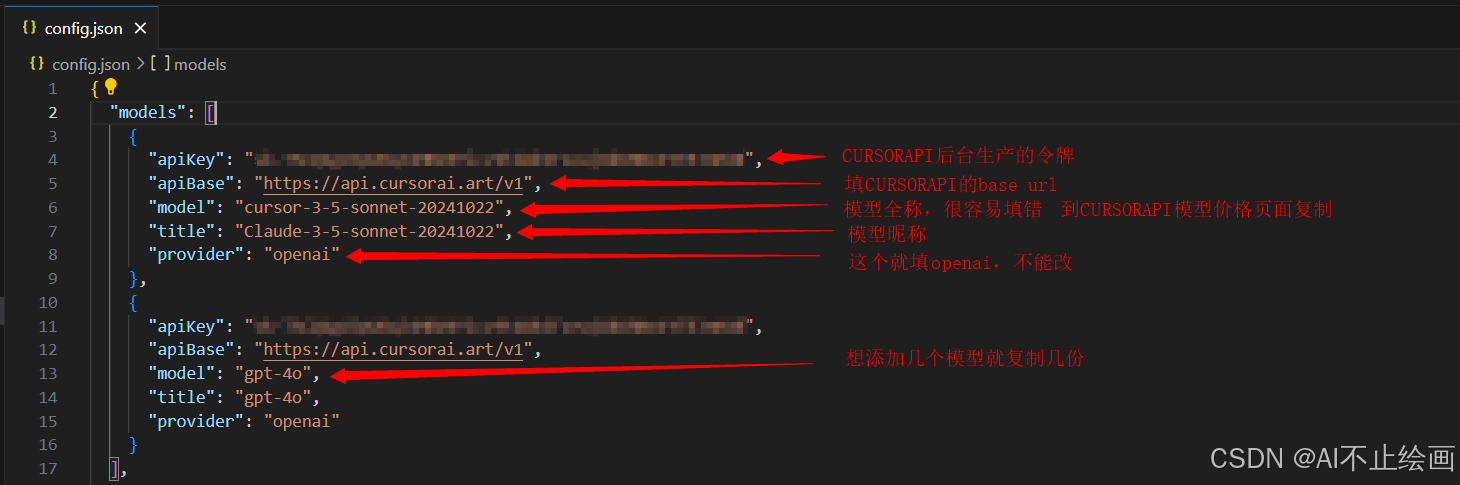
在 VSCode 中,按 Ctrl+Shift+P 打开命令面板,输入 “Continue : Open configution file”,然后"models"中增加模型配置。例如:
    {
      "apiKey": "你的apikey",
      "apiBase": "https://api.cursorai.art/v1",
      "model": "cursor-3-5-sonnet-20241022",
      "title": "Claude-3-5-sonnet-20241022",
      "systemMessage": "You are an expert software developer. You give helpful and concise responses.",
      "provider": "openai"
    }
*注意模型配置之间要用英文逗号相隔,最后一个模型不需要逗号!!!
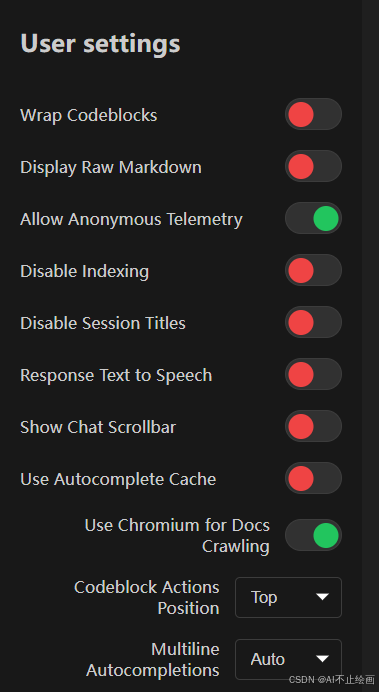
2. 自定义插件设置
根据您的开发需求,调整 Continue 插件的User setting,例如使用谷歌来搜索文档等。
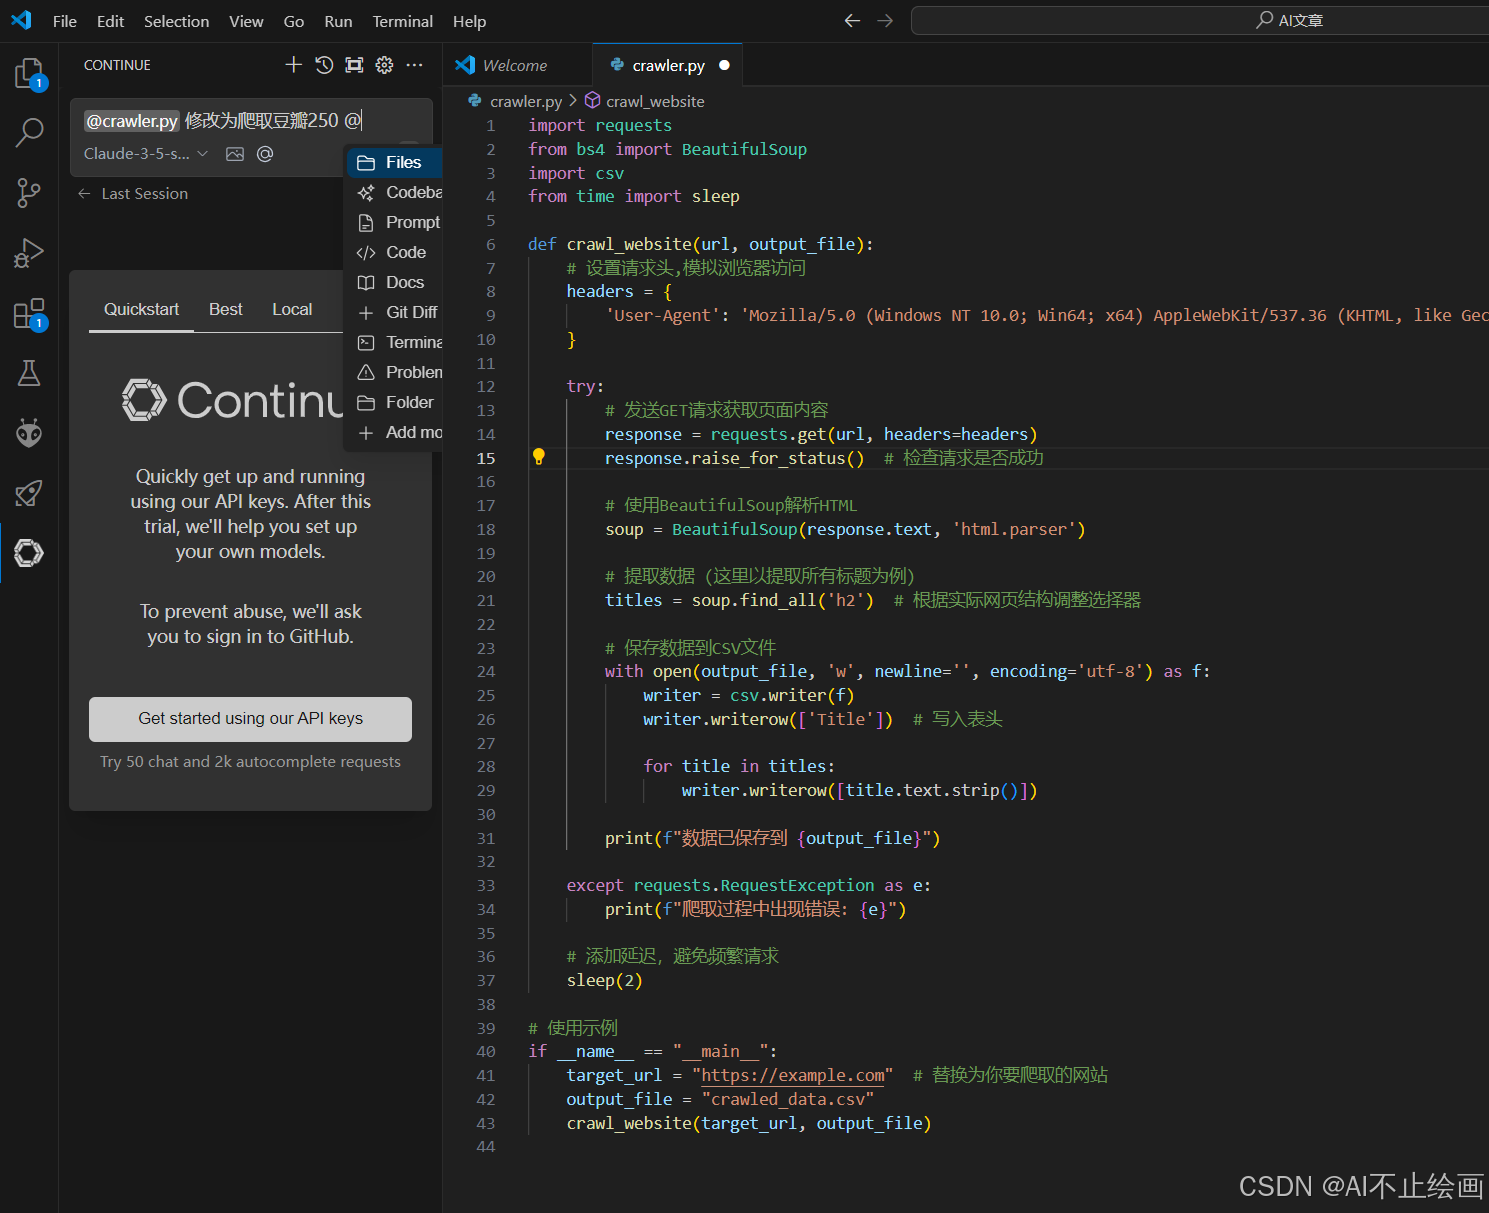
4. 使用 Continue 进行 AI 开发
在代码编辑器中,选择刚刚配置的模型,输入@,可以让Continue读取任意文件,插件将使用 Claude 3.5 模型生成代码优化建议。
5. 配置自动补全模型(选配)
在模型配置文件中,修改"tabAutocompleteModel"部分的代码为:
  "tabAutocompleteModel":     {
    "apiKey": "你的apikey",
    "apiBase": "https://api.cursorai.art/v1",
    "model": "gpt-4o-mini",
    "title": "gpt-4o-mini",
    "provider": "openai"
  }
示例与演示
代码优化示例
import requests
from bs4 import BeautifulSoup
import csv
from time import sleep

def crawl_website(url, output_file):
    # 设置请求头,模拟浏览器访问
    headers = {
        'User-Agent': 'Mozilla/5.0 (Windows NT 10.0; Win64; x64) AppleWebKit/537.36 (KHTML, like Gecko) Chrome/91.0.4472.124 Safari/537.36'
    }

    try:
        # 发送GET请求获取页面内容
        response = requests.get(url, headers=headers)
        response.raise_for_status()  # 检查请求是否成功

        # 使用BeautifulSoup解析HTML
        soup = BeautifulSoup(response.text, 'html.parser')

        # 提取数据 (这里以提取所有标题为例)
        titles = soup.find_all('h2')  # 根据实际网页结构调整选择器

        # 保存数据到CSV文件
        with open(output_file, 'w', newline='', encoding='utf-8') as f:
            writer = csv.writer(f)
            writer.writerow(['Title'])  # 写入表头

            for title in titles:
                writer.writerow([title.text.strip()])

        print(f"数据已保存到 {output_file}")

    except requests.RequestException as e:
        print(f"爬取过程中出现错误: {e}")

    # 添加延迟,避免频繁请求
    sleep(2)

# 使用示例
if __name__ == "__main__":
    target_url = "https://example.com"  # 替换为你要爬取的网站
    output_file = "crawled_data.csv"
    crawl_website(target_url, output_file)
使用 Continue 生成的优化建议:(prompt:修改为分页爬取豆瓣250)
import requests
from bs4 import BeautifulSoup
import csv
from time import sleep
import random

def crawl_douban_top250(output_file, items_per_page=25):
    base_url = "https://movie.douban.com/top250"
    headers = {
        'User-Agent': 'Mozilla/5.0 (Windows NT 10.0; Win64; x64) AppleWebKit/537.36 (KHTML, like Gecko) Chrome/91.0.4472.124 Safari/537.36',
        'Accept': 'text/html,application/xhtml+xml,application/xml;q=0.9,image/webp,*/*;q=0.8',
        'Accept-Language': 'zh-CN,zh;q=0.9,en;q=0.8',
    }

    total_pages = 10
    movies_data = []

    try:
        for page in range(total_pages):
            start_index = page * items_per_page
            url = f"{base_url}?start={start_index}"

            print(f"正在爬取第{page + 1}页...")
            response = requests.get(url, headers=headers)
            response.raise_for_status()

            soup = BeautifulSoup(response.text, 'html.parser')
            movie_items = soup.find_all('div', class_='item')

            if not movie_items:
                print(f"警告:第{page + 1}页没有找到电影数据")
                continue

            for item in movie_items:
                try:
                    rank = item.find('em').text
                    title = item.find('span', class_='title').text
                    info = item.find('div', class_='bd').find('p').text.strip()

                    info_lines = [line.strip() for line in info.split('\n') if line.strip()]
                    year = info_lines[1].split('/')[0].strip()
                    director = info_lines[0].split('导演: ')[1].split('主演:')[0].strip()

                    rating = item.find('span', class_='rating_num').text
                    votes = item.find('div', class_='star').find_all('span')[-1].text
                    votes = ''.join(filter(str.isdigit, votes))

                    movies_data.append([rank, title, year, director, rating, votes])
                    print(f"已爬取:{title}")
                except Exception as e:
                    print(f"处理电影数据时出现错误: {e}")
                    continue

        delay = random.uniform(3, 7)
        print(f"等待 {delay:.2f} 秒后继续...")
        sleep(delay)

        with open(output_file, 'w', newline='', encoding='utf-8-sig') as f:
            writer = csv.writer(f)
            writer.writerow(['排名', '电影名', '年份', '导演', '评分', '评价人数'])
            writer.writerows(movies_data)

            print(f"爬取完成!共爬取 {len(movies_data)} 部电影")
            print(f"数据已保存到 {output_file}")

    except requests.RequestException as e:
        print(f"网络请求错误: {e}")
    except Exception as e:
        print(f"程序执行错误: {e}")

if __name__ == "__main__":
    output_file = "douban_top250.csv"
    crawl_douban_top250(output_file)
提示与注意事项
提示:确保您的 API 密钥安全,不要在公共代码库中泄露。
注意:在调用 API 时,请务必添加 try 重试机制,以提升代码的健壮性。
常见问题解答
Q1: 如何获取 Claude 3.5 的 API 密钥?
A1: 您可以访问 CURSOR API,注册并登录,在令牌页面新建令牌获取 API 密钥。
Q2: Continue 插件不工作怎么办?
A2: 请检查您的 API 密钥是否正确配置,并确保您的网络连接正常。此外,查看 VSCode 的输出面板以获取错误日志。
Q3: 如何自定义提示模板?
A3: 在 Continue 插件的设置页面中,找到 “Workspace prompts path” 选项,输入您自定义的提示内容。
Q4: Claude 3.5不支持一键写入代码?
A3: 这是官方原因,Anthropic 目前不提供任何自动完成模型。把模型换成gpt-4o就可以了。
总结
通过本教程,您已经学会如何在 VSCode 中安装和配置 Continue 插件,利用自定义key 使用 Openai gpt系列模型 或 Claude 3.5 模型提升 AI 开发效率。合理配置和使用这些工具,可以显著提高您的开发生产力。
接下来,您可以探索更多 Continue 插件的高级功能,或尝试集成其他 AI 模型以满足更复杂的开发需求。
参考资料与延伸阅读
相关下载

有“AI”的1024 = 2048,欢迎大家加入2048 AI社区
更多推荐


 30
30 0
0- 0


 已为社区贡献6条内容

所有评论(0)