ubuntu安装开源运动规划库ompl
ubuntu安装运动规划库ompl本文介绍在Ubuntu18.04上安装开源运动规划库ompl。方法1下载install-ompl-ubuntu.sh,地址https://ompl.kavrakilab.org/install-ompl-ubuntu.shchmod u+x install-ompl-ubuntu.sh有四个安装选项,根据自己需要执行其中一条指令。有四个安装选项,根据自己需要执行其
ubuntu安装运动规划库ompl
本文介绍在Ubuntu18.04上安装开源运动规划库ompl。
方法1
下载install-ompl-ubuntu.sh,地址https://ompl.kavrakilab.org/install-ompl-ubuntu.sh,并修改执行权限。
chmod u+x install-ompl-ubuntu.sh


有四个安装选项,根据自己需要执行其中一条指令。
./install-ompl-ubuntu.sh will install the latest release of OMPL without Python bindings
./install-ompl-ubuntu.sh --python will install the latest release of OMPL with Python bindings
./install-ompl-ubuntu.sh --app will install the latest release of OMPL.app with Python bindings
./install-ompl-ubuntu.sh --github will install the master branch of OMPL (this can be combined with the other flags above)
使用该方法安装时若没有科学上网,网速会非常慢,安装常常失败。因此可以使用下面的方法安装。
报错处理:
执行./install-ompl-ubuntu.sh --app安装过程中,我出现如下错误,这个错误可能不是每个人的安装环境都出现。
Successfully installed pygccxml-2.0.1
Cleaning up...
tar: castxml/bin: Cannot utime: Operation not permitted
tar: castxml/bin: Cannot change mode to rwxr-xr-x: Operation not permitted
tar: castxml: Cannot utime: Operation not permitted
tar: castxml: Cannot change mode to rwxr-xr-x: Operation not permitted
tar: Exiting with failure status due to previous errors
这是因为这个文件夹 castxml权限问题,网上查阅发现类似错误是文件的不是操作的所有者导致错误。
可以在home目录下发现这个文件夹(这应该是ompl安装过程中临时存放在这里的)。使用如下指令更改文件所有者。我这里是以brian登录,用户组也是brian。
sudo chown -R brian:brian castxml
修复权限后再执行安装指令
/install-ompl-ubuntu.sh –app
使用该方法安装时若没有科学上网,网速会非常慢,安装常常失败。因此可以使用下面的方法安装。
方法2
1)在以下网址源码压缩包。
下载地址:http://www.mirrorservice.org/sites/distfiles.macports.org/ompl/?C=S;O=A
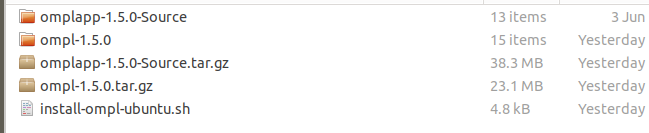
ompl-1.5.0.tar.gz
omplapp-1.5.0-Source.tar.gz
并把ompl-1.5.0.tar.gz解压,把里面的文件夹ompl-ompl-3a98d97改名为ompl-1.5.0。
把omplapp-1.5.0-Source.tar.gz解压,得到omplapp-1.5.0-Source
把ompl-1.5.0、omplapp-1.5.0-Source两个文件夹和install-ompl-ubuntu.sh放在同一个目录。
(2)修改安装脚本
把安装脚本与上面的文件放在同一个目录下。打开install-ompl-ubuntu.sh,修改install_opml()函数:
1)把 wget -O - https://github.com/ompl/${OMPL}/archive/1.5.0.tar.gz | tar zxf -改为 tar zxf ${OMPL}-1.5.0.tar.gz
2)把 wget -O - https://github.com/ompl/${OMPL}/releases/download/1.5.0/${OMPL}-1.5.0-Source.tar.gz | tar zxf -改为tar zxf $OMPL-1.5.0-Source.tar.gz
实际更改的时候根据自己安装的版本号做修改,我这里安装的版本是1.5.0。
3)把脚本里面关于git clone ompl的操作取消,如下
#git clone --recurse-submodules https://github.com/ompl/${OMPL}.git
(3)执行安装指令
./install-ompl-ubuntu.sh --app
最后安装完成如下图所示。
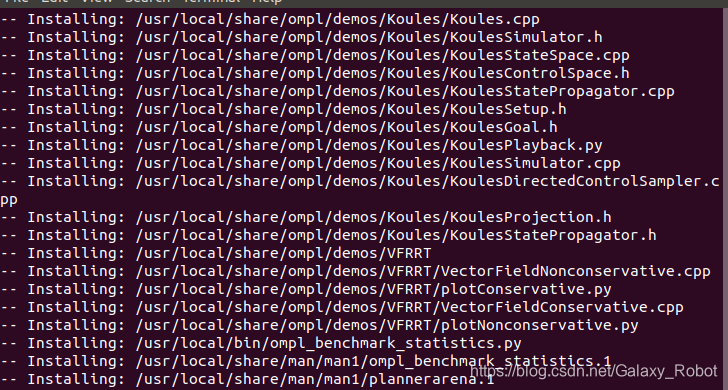
4)检查安装是否成功
安装成功后,在ompl/build/Release/bin目录下会有很多示例,执行一下示例,能成功运行那么安装就成功了。
./demo_RigidBodyPlanning
OMPL version:
Info: RRTConnect: Space information setup was not yet called. Calling now.
Debug: RRTConnect: Planner range detected to be 1.006980
Settings for the state space 'SE3CompoundSpace0'
- state validity check resolution: 1%
- valid segment count factor: 1
- state space:
…………………..
方法3
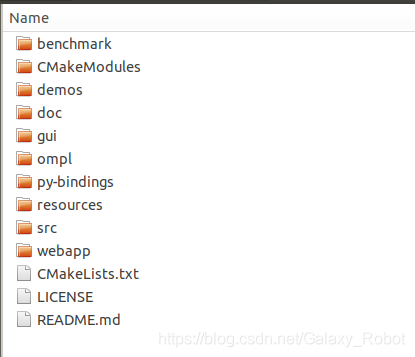
直接下载源码,源码根目录下有CMakeLists.txt文件,使用Qtcreate打开CMakeLists.txt就会自动进行工程配置,再进行编译即可。编译是对大量的demo进行编译。
小结
我使用方法1一直没有安装成功,主要是下载速度太慢了,一直安装不成功。使用方法2手动下载安装源码和修改安装脚本终于安装成功了。方法2安装需要以下文件,我已经分享到这里【下载地址:https://download.csdn.net/download/Galaxy_Robot/12826405】.
这里只是记录了我安装的方法和细节,成功安装了ompl库。可能你的电脑环境有所区别,并不能保证100%能安装成功。

有“AI”的1024 = 2048,欢迎大家加入2048 AI社区
更多推荐


 10
10 0
0- 0


 已为社区贡献3条内容

所有评论(0)