Visual Studio 2022 配置VTK9.3.0
本文想介绍的内容不只是如何成功配置opencv与vtk,更想介绍的是如何去解决实际开发中遇到的缺少头文件、缺少静态依赖项、缺少动态库这类问题。
0、前言
之前已经介绍过vs配置opencv的博文:VIsual Studio 配置OpenCV,两者的任意版本均可配置。
这两篇文章想介绍的内容不只是如何成功配置opencv与vtk,更想介绍的是如何去解决实际开发中遇到的例如缺少头文件、缺少静态依赖项、缺少动态库这类问题。
本文同vs配置opencv一样,通过发现问题、解决问题的方式来对进行VTK的配置过程。这里继续用同样的方法从无开始配置。
1. VTK下载和编译
vtk源码不同于之前的opencv库,vtk需要自己用CMake进行编译处理,opencv是帮你编译好了直接用的。
关于怎么用CMake编译VTK的这里有文章可以参考:详细图文讲解CMake编译VTK,包含详细地编译环境版本
也有上面文章编译好的压缩包:链接:https://pan.baidu.com/s/1YBbzsd-MUItY8Pma-mLSxA?pwd=qh57 提取码:qh57
2. vs2022配置vtk9.3.0
2.1 vs新建一个空项目
新建一个空项目,本次示例使用的代码如下:
#include <vtkActor.h>
#include <vtkAssembly.h>
#include <vtkCubeSource.h>
#include <vtkNamedColors.h>
#include <vtkNew.h>
#include <vtkPolyDataMapper.h>
#include <vtkProperty.h>
#include <vtkRenderWindow.h>
#include <vtkInteractorStyleTrackballCamera.h>
#include <vtkRenderWindowInteractor.h>
#include <vtkRenderer.h>
#include <vtkSphereSource.h>
#include <vtkTransform.h>
#include <vtkAutoInit.h>
VTK_MODULE_INIT(vtkRenderingOpenGL2);
VTK_MODULE_INIT(vtkInteractionStyle);

int main(int, char* [])
{
	vtkNew<vtkNamedColors> namedColors;

	// Create a sphere.
	vtkNew<vtkSphereSource> sphereSource;
	sphereSource->Update();

	vtkNew<vtkPolyDataMapper> sphereMapper;
	sphereMapper->SetInputConnection(sphereSource->GetOutputPort());
	vtkNew<vtkActor> sphereActor;
	sphereActor->SetMapper(sphereMapper);
	sphereActor->GetProperty()->SetColor(
		namedColors->GetColor3d("Banana").GetData());

	// Create a cube.
	vtkNew<vtkCubeSource> cubeSource;
	cubeSource->SetCenter(5.0, 0.0, 0.0);
	cubeSource->Update();

	vtkNew<vtkPolyDataMapper> cubeMapper;
	cubeMapper->SetInputConnection(cubeSource->GetOutputPort());
	vtkNew<vtkActor> cubeActor;
	cubeActor->SetMapper(cubeMapper);
	cubeActor->GetProperty()->SetColor(
		namedColors->GetColor3d("Tomato").GetData());
	// Combine the sphere and cube into an assembly.
	vtkNew<vtkAssembly> assembly;
	assembly->AddPart(sphereActor);
	assembly->AddPart(cubeActor);

	// Apply a transform to the whole assembly.
	vtkNew<vtkTransform> transform;
	transform->PostMultiply(); // This is the key line.
	transform->Translate(5.0, 0, 0);

	assembly->SetUserTransform(transform);

	// Extract each actor from the assembly and change its opacity.
	vtkNew<vtkPropCollection> collection;

	assembly->GetActors(collection);
	collection->InitTraversal();
	for (vtkIdType i = 0; i < collection->GetNumberOfItems(); i++)
	{
		dynamic_cast<vtkActor*>(collection->GetNextProp())
			->GetProperty()
			->SetOpacity(0.5);
	}

	// Visualization
	vtkNew<vtkRenderer> renderer;
	vtkNew<vtkRenderWindow> renderWindow;
	renderWindow->AddRenderer(renderer);

	vtkNew<vtkRenderWindowInteractor> renderWindowInteractor;
	renderWindowInteractor->SetRenderWindow(renderWindow);

	vtkSmartPointer<vtkInteractorStyleTrackballCamera> style =
		vtkSmartPointer<vtkInteractorStyleTrackballCamera>::New();

	renderWindowInteractor->SetInteractorStyle(style);

	renderer->AddActor(assembly);
	renderer->SetBackground(namedColors->GetColor3d("SlateGray").GetData());

	renderer->ResetCamera();
	renderWindow->SetWindowName("Assembly");
	renderWindow->Render();

	renderWindowInteractor->Start();

	return EXIT_SUCCESS;
}
2.2 引入头文件
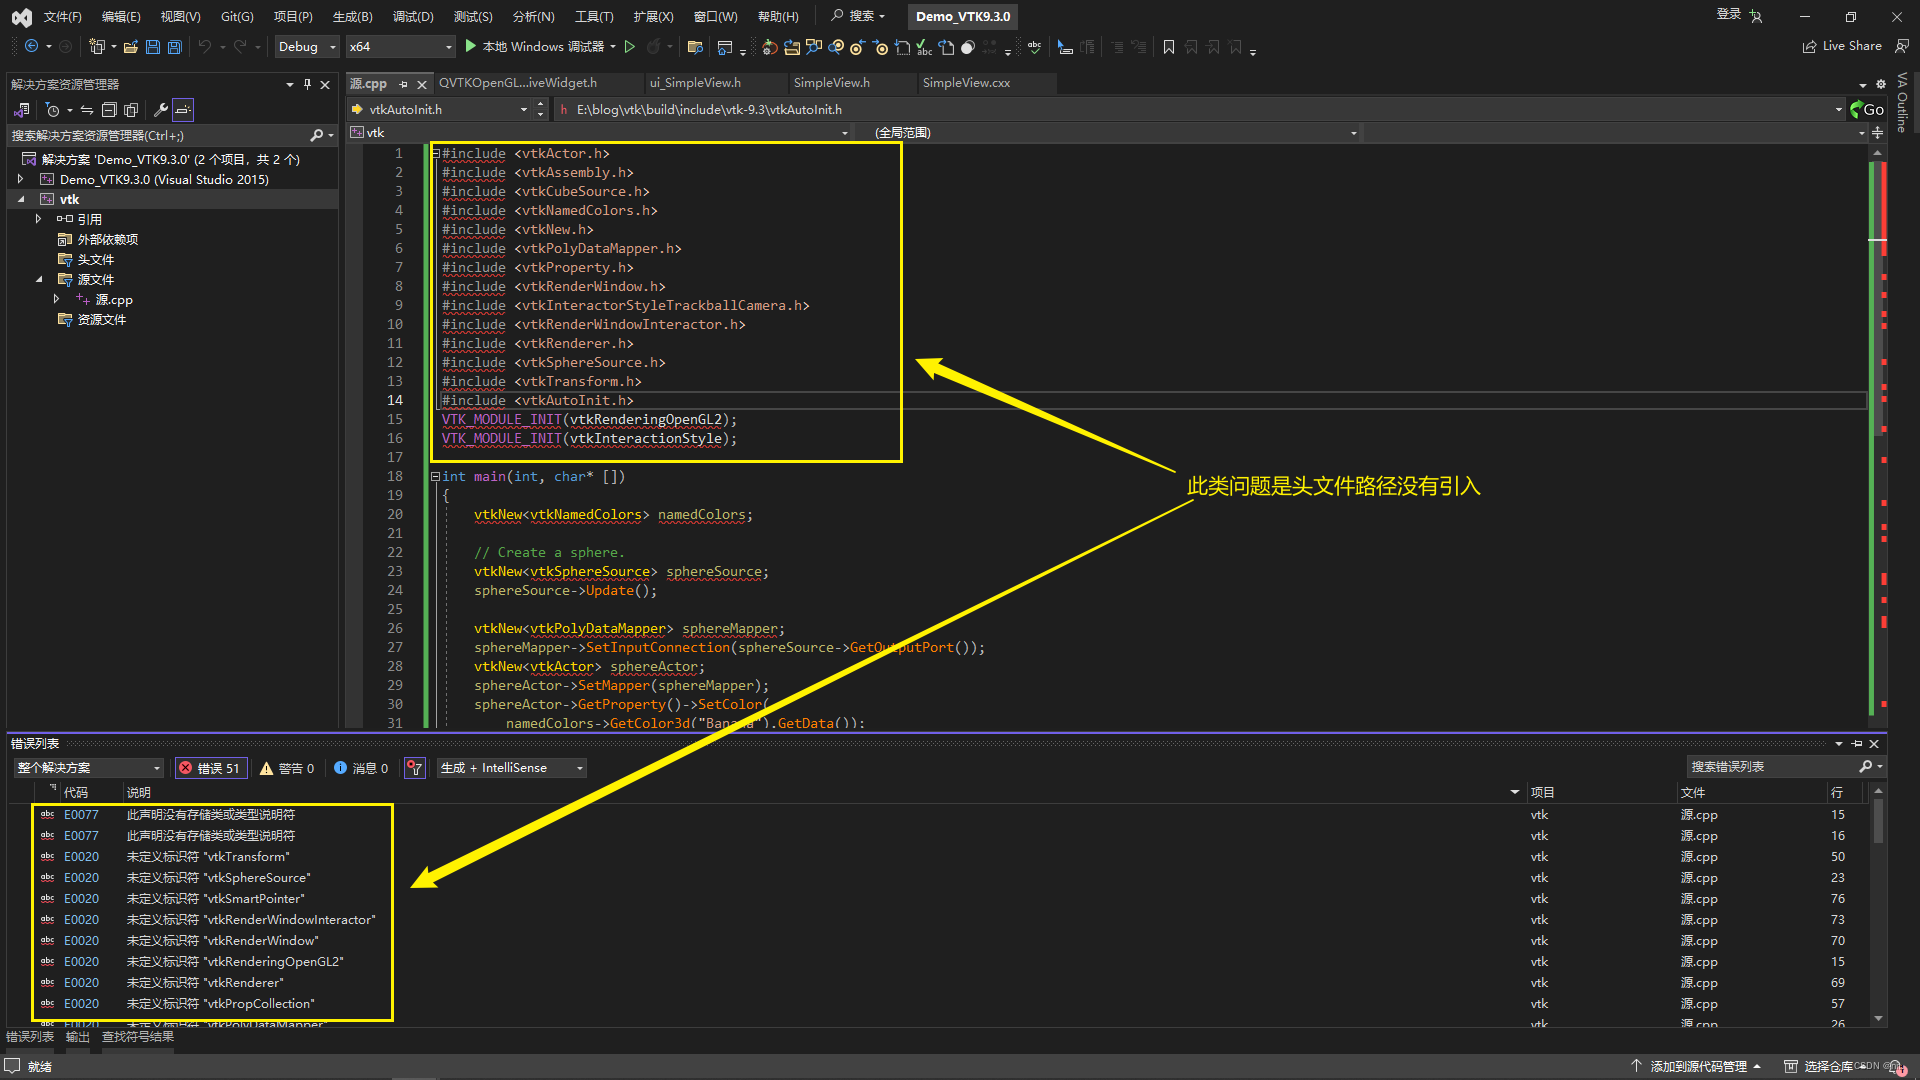
创建一个cpp文件并把上面的代码放入后,会看到一片报错信息。如:无法打开 源文件"xxx.hpp"、未定义标识符 “xxx”。
- 【报错情况 1】 无法打开 源文件"xxx.hpp"、未定义标识符 “xxx”。
-
【原因 1】 :缺少vtk库的相关头文件 。
-
【解决办法 1】 在"配置属性" - “C/C++” - "常规“ - “附加包含目录” 中把自己vtk文件路径下的
..\build\include\vtk-9.3添加进去。(路径里面有"vtk-9.3"是因为头文件的路径在包含在".../vtk-9.3/"里面)

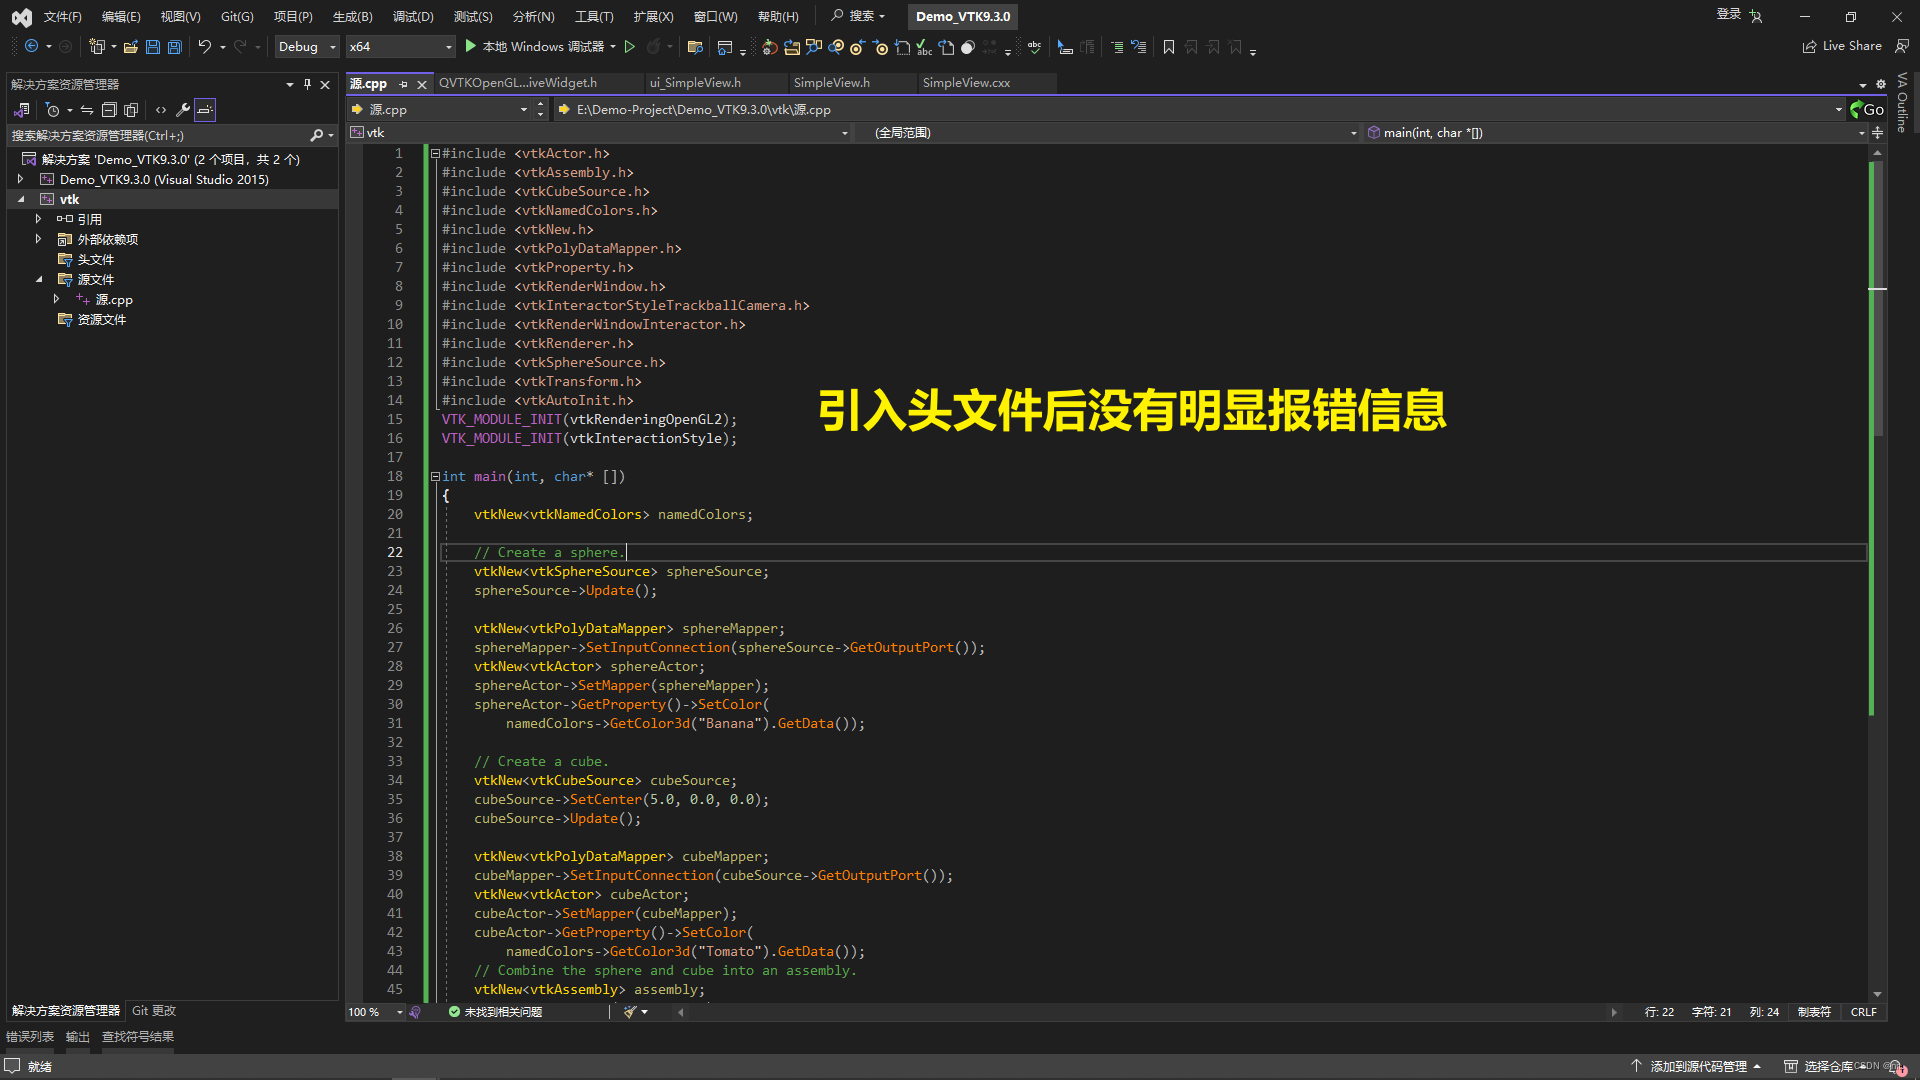
- 【解决效果 1】 可以看到,引入头文件后已经没有【报错情况 1】的报错信息。
2.2.2 引入Lib文件
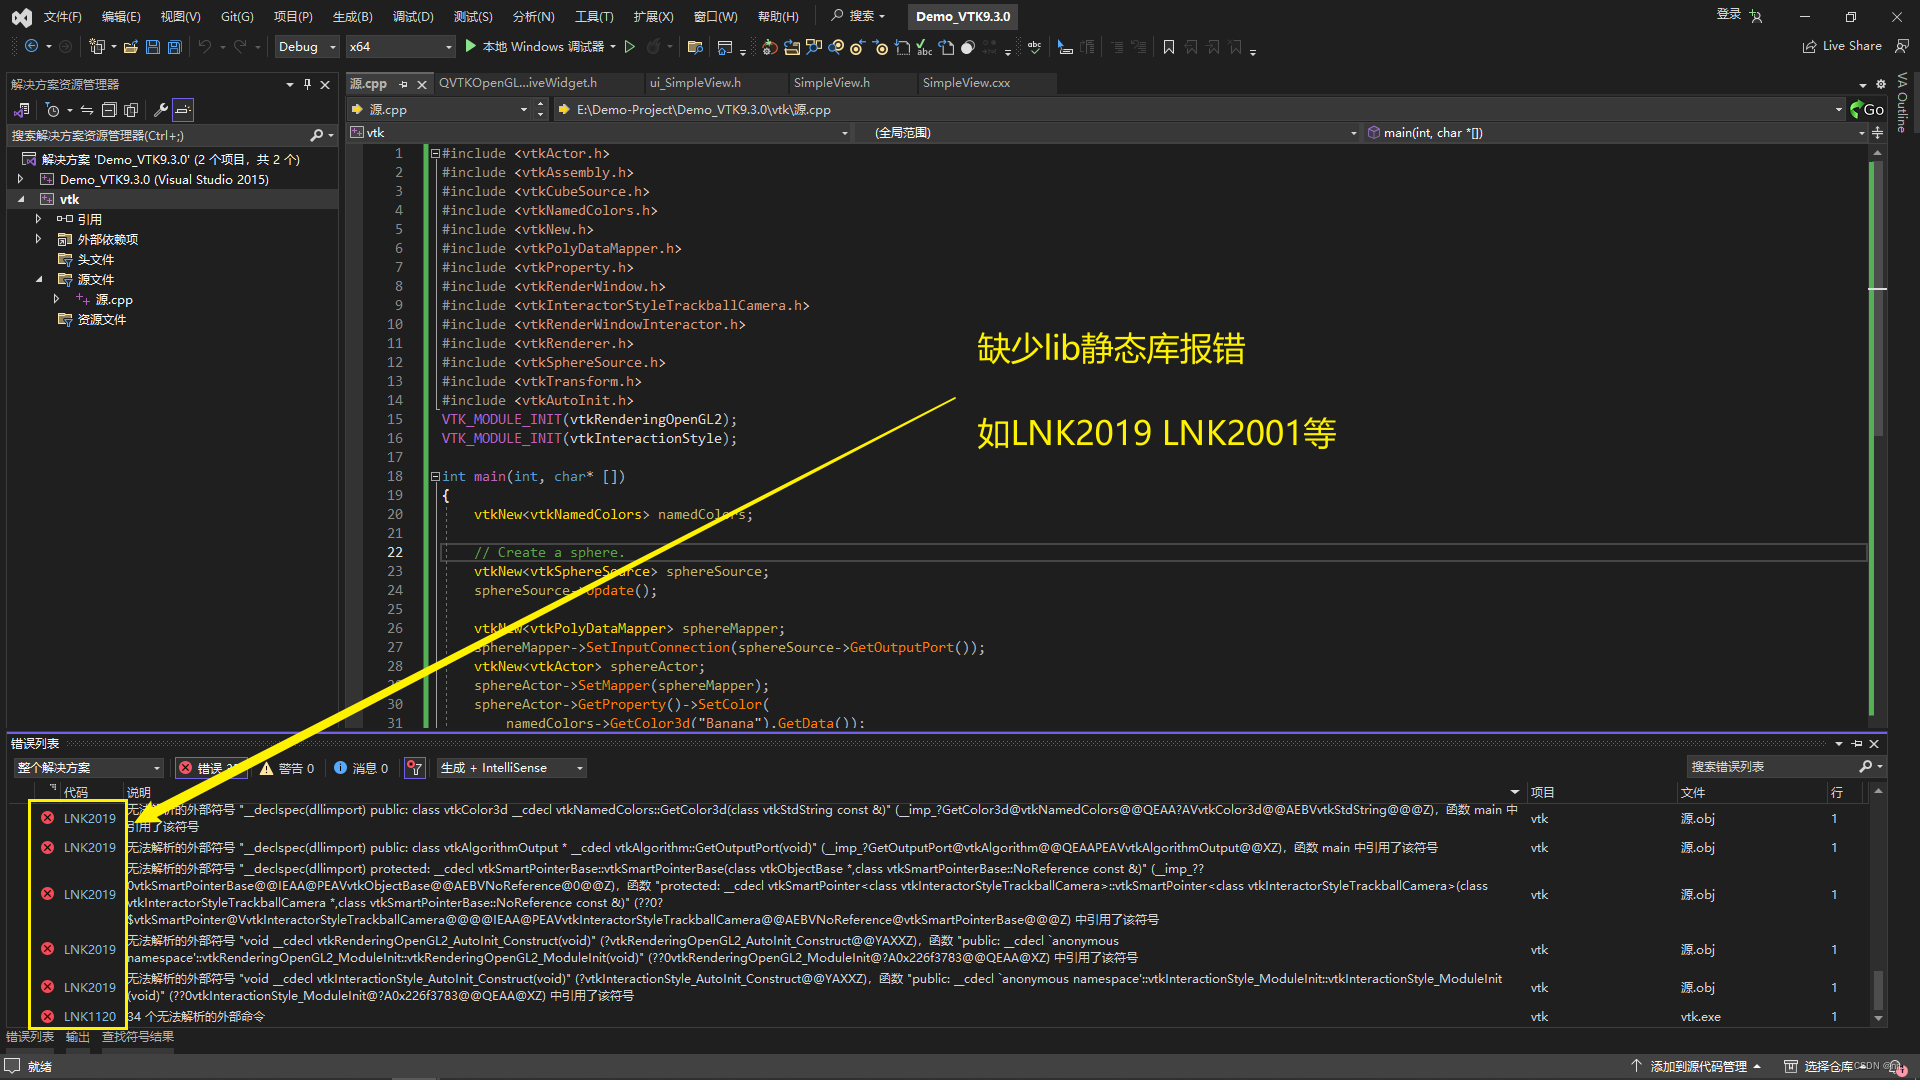
引入头文件后没有报错信息,直接运行,会显示" Link 2019 " " Link 2001 " 等报错信息。
- 【报错情况 2】 LNK2019: 无法解析的外部符号 ”xxxx"、 LNK2001: 无法解析的外部符号 ”xxxx"
-
【原因 2】 (个人猜测,如有不对,请批评指正)个人猜测虽然已经引入了头文件,并没有具体的cpp文件去实现相应功能。 vtk库把相关的cpp部分封装到了Lib中去。(为什么我猜测是部分呢,因为Lib是静态库,DLL是动态库,后面还有一个问题是缺少DLL)
-
【解决方法 2】 把vtk的Lib目录所有lib文件
E:\blog\vtk\build\lib\debug\*d.lib【这是我的路径】添加到 “配置属性” - “链接器” - “输入” - “附加依赖项” 中(因为lib文件很多,我暂时没找到具体需要哪些,就全部加入了)。..\*d.lib表示debug模式下的lib文件,如果是Release模式则用...\*.lib。

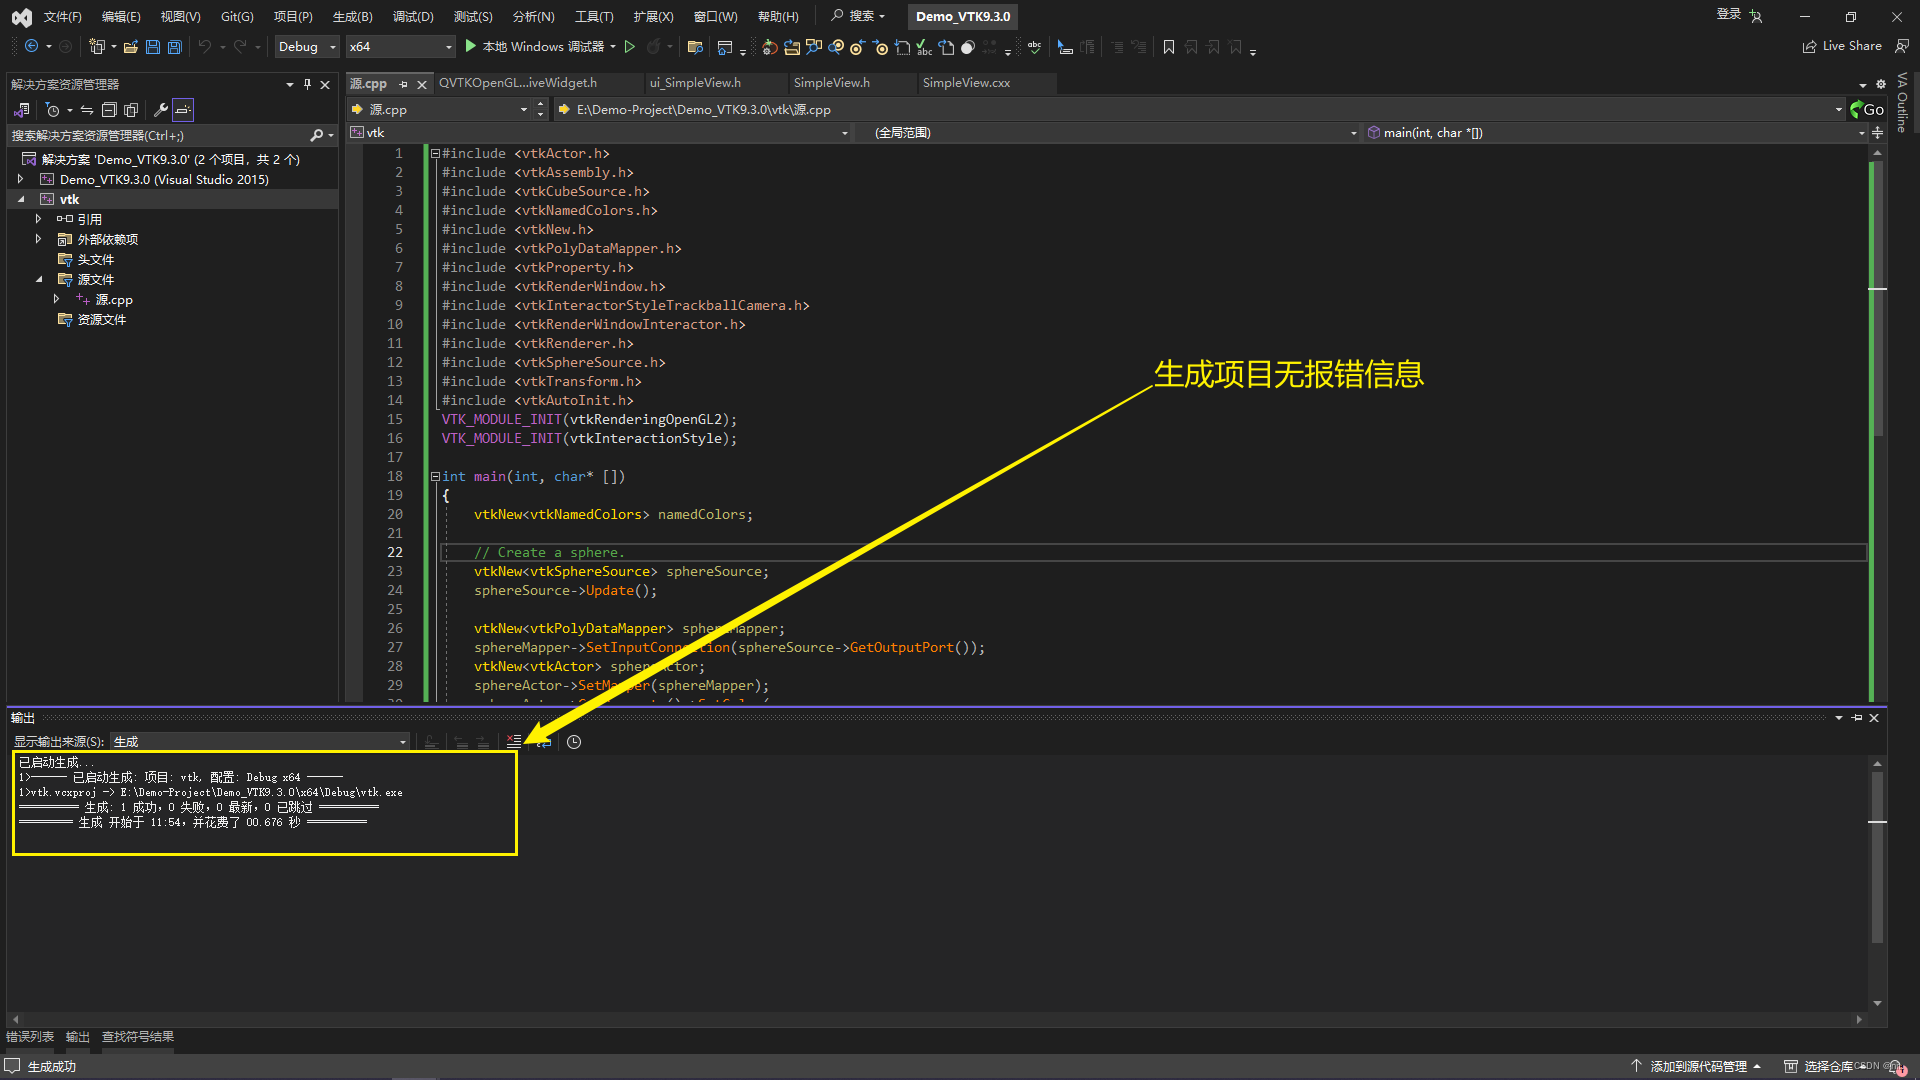
- 【解决效果 2】 运行程序后没有【报错信息 2】的内容。但是报错 ”找不到 xxx.dll "
2.2.3 引入DLL文件
2.2.2 小节配置了静态库,生成项目没有报错,但如果直接运行项目,会显示缺少xxx.dll。
DLL是运行过程中缺少的动态库文件,要解决缺少相关DLL的问题,只需要把相关的DLL放在程序exe的执行目录下。
- 【报错情况 3】 由于找不到 “xxx.dll”,无法继续执行代码。
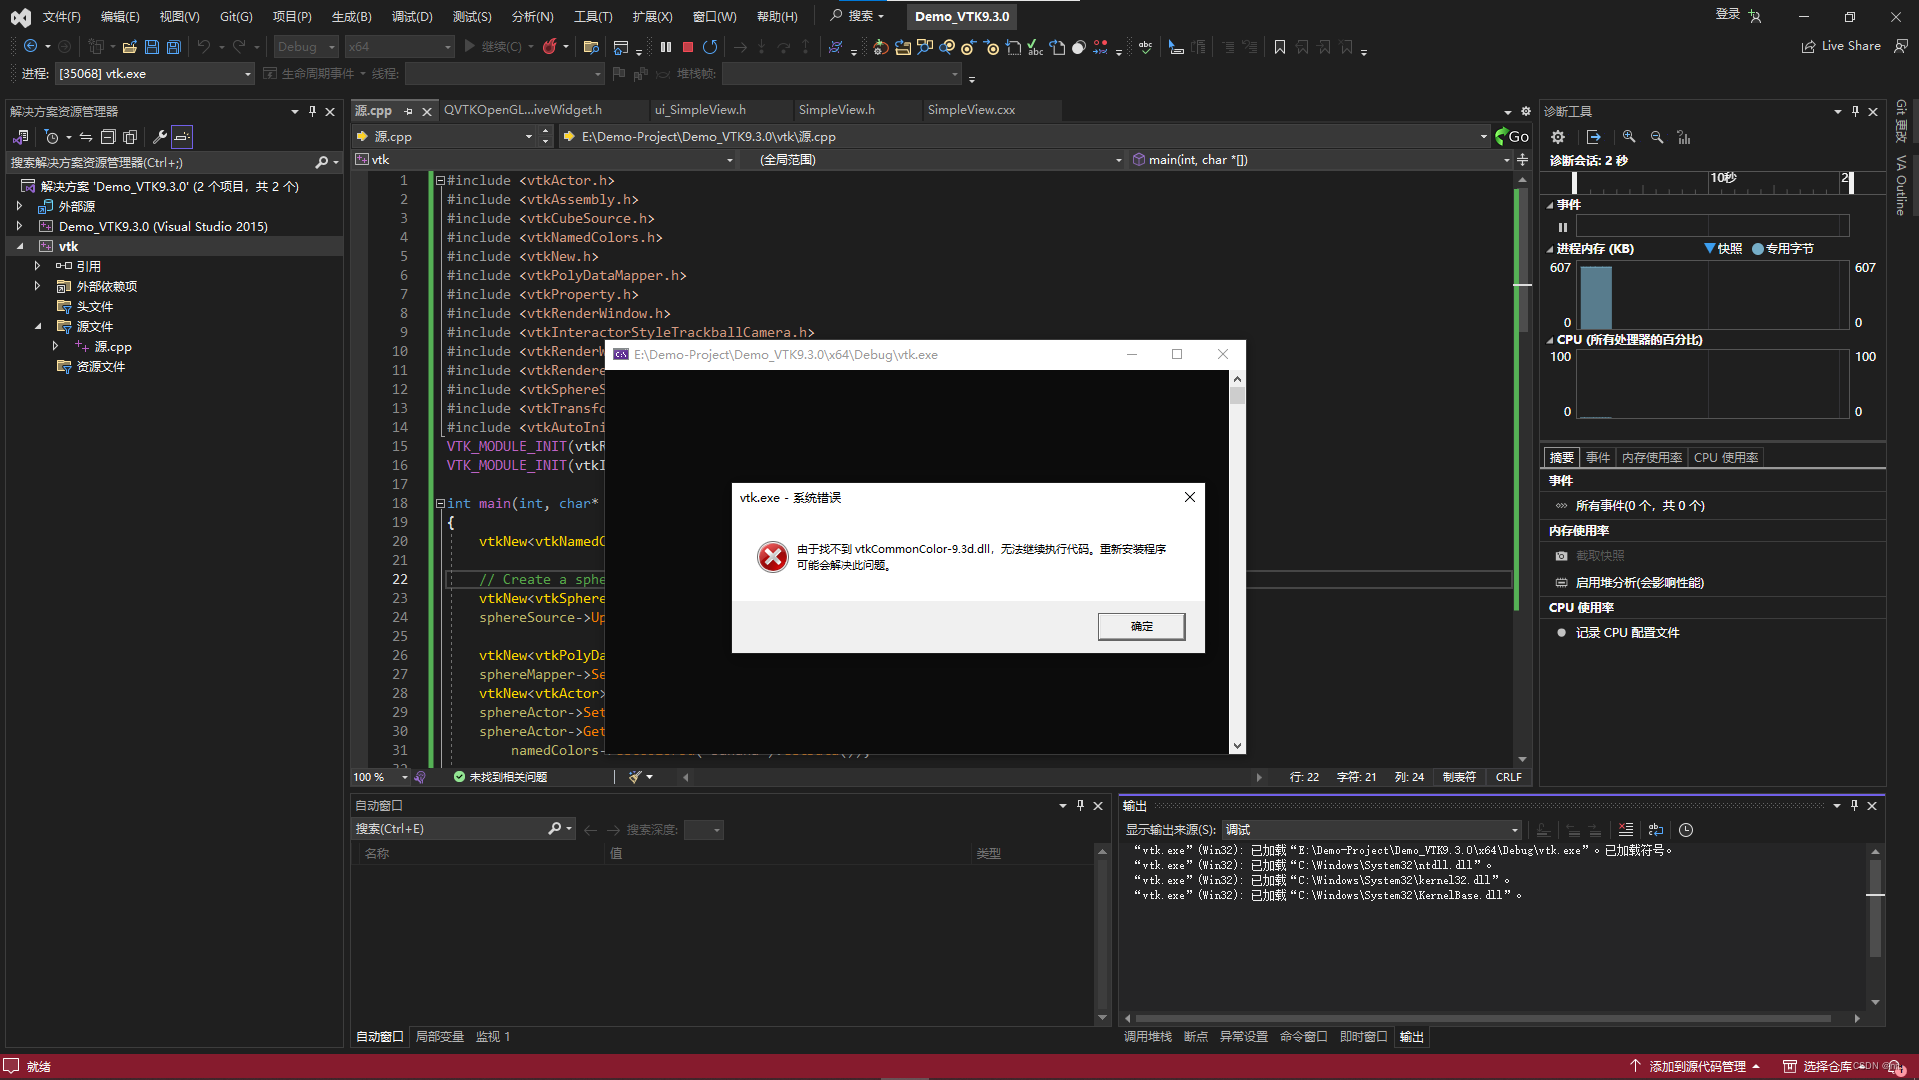
- 【原因 3】 (个人猜测)猜测是封装的cpp部分在Lib里面,部分在DLL里面。Lib与DLL的区别简单讲就是Lib是编译前引入,DLL是运行是引入。
- 【解决报错 3】 把vtk目录下
E:\blog\vtk\build\bin\debug【注意,这是我的路径】的所有文件(选择所有文件的原因也是为了方便,当然用DependenciesGui也可以去找具体缺少哪些)复制到exe的目录下(有一个自动搬运的操作,我暂时没找到)。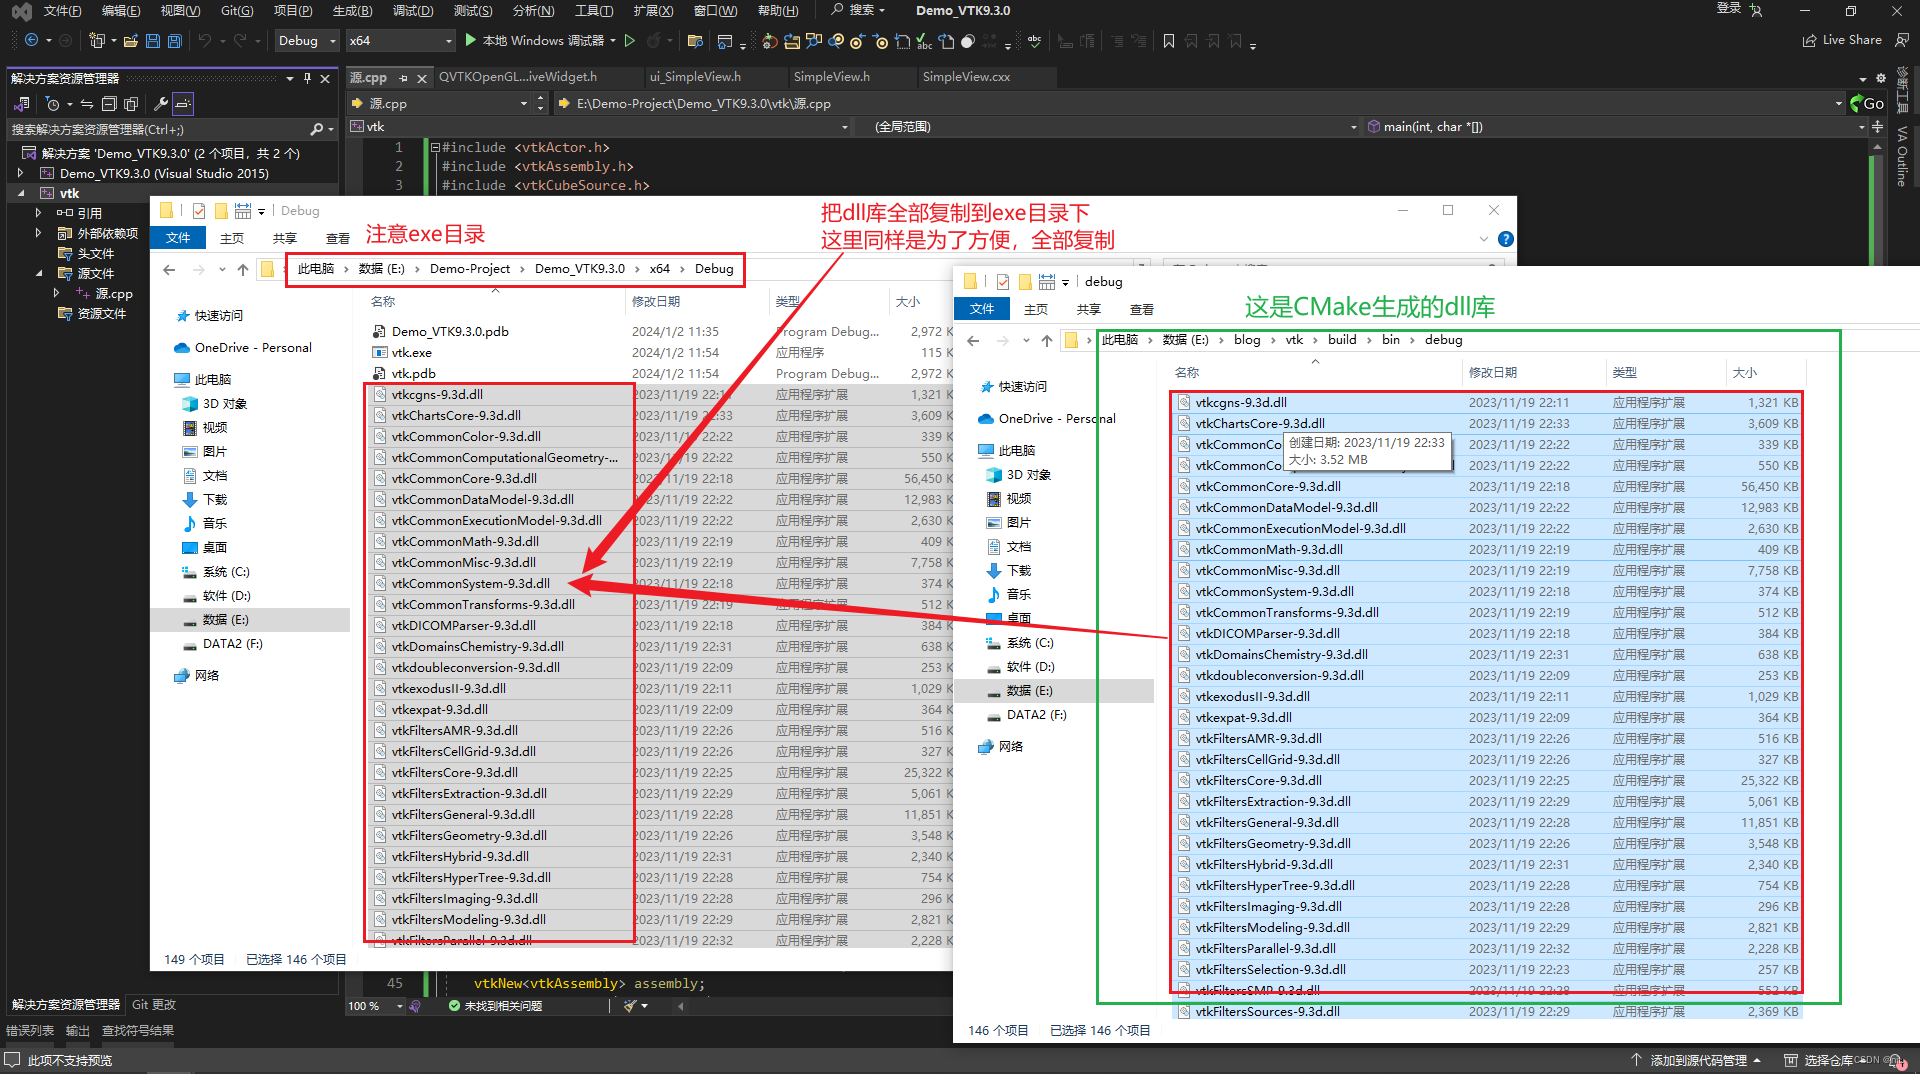
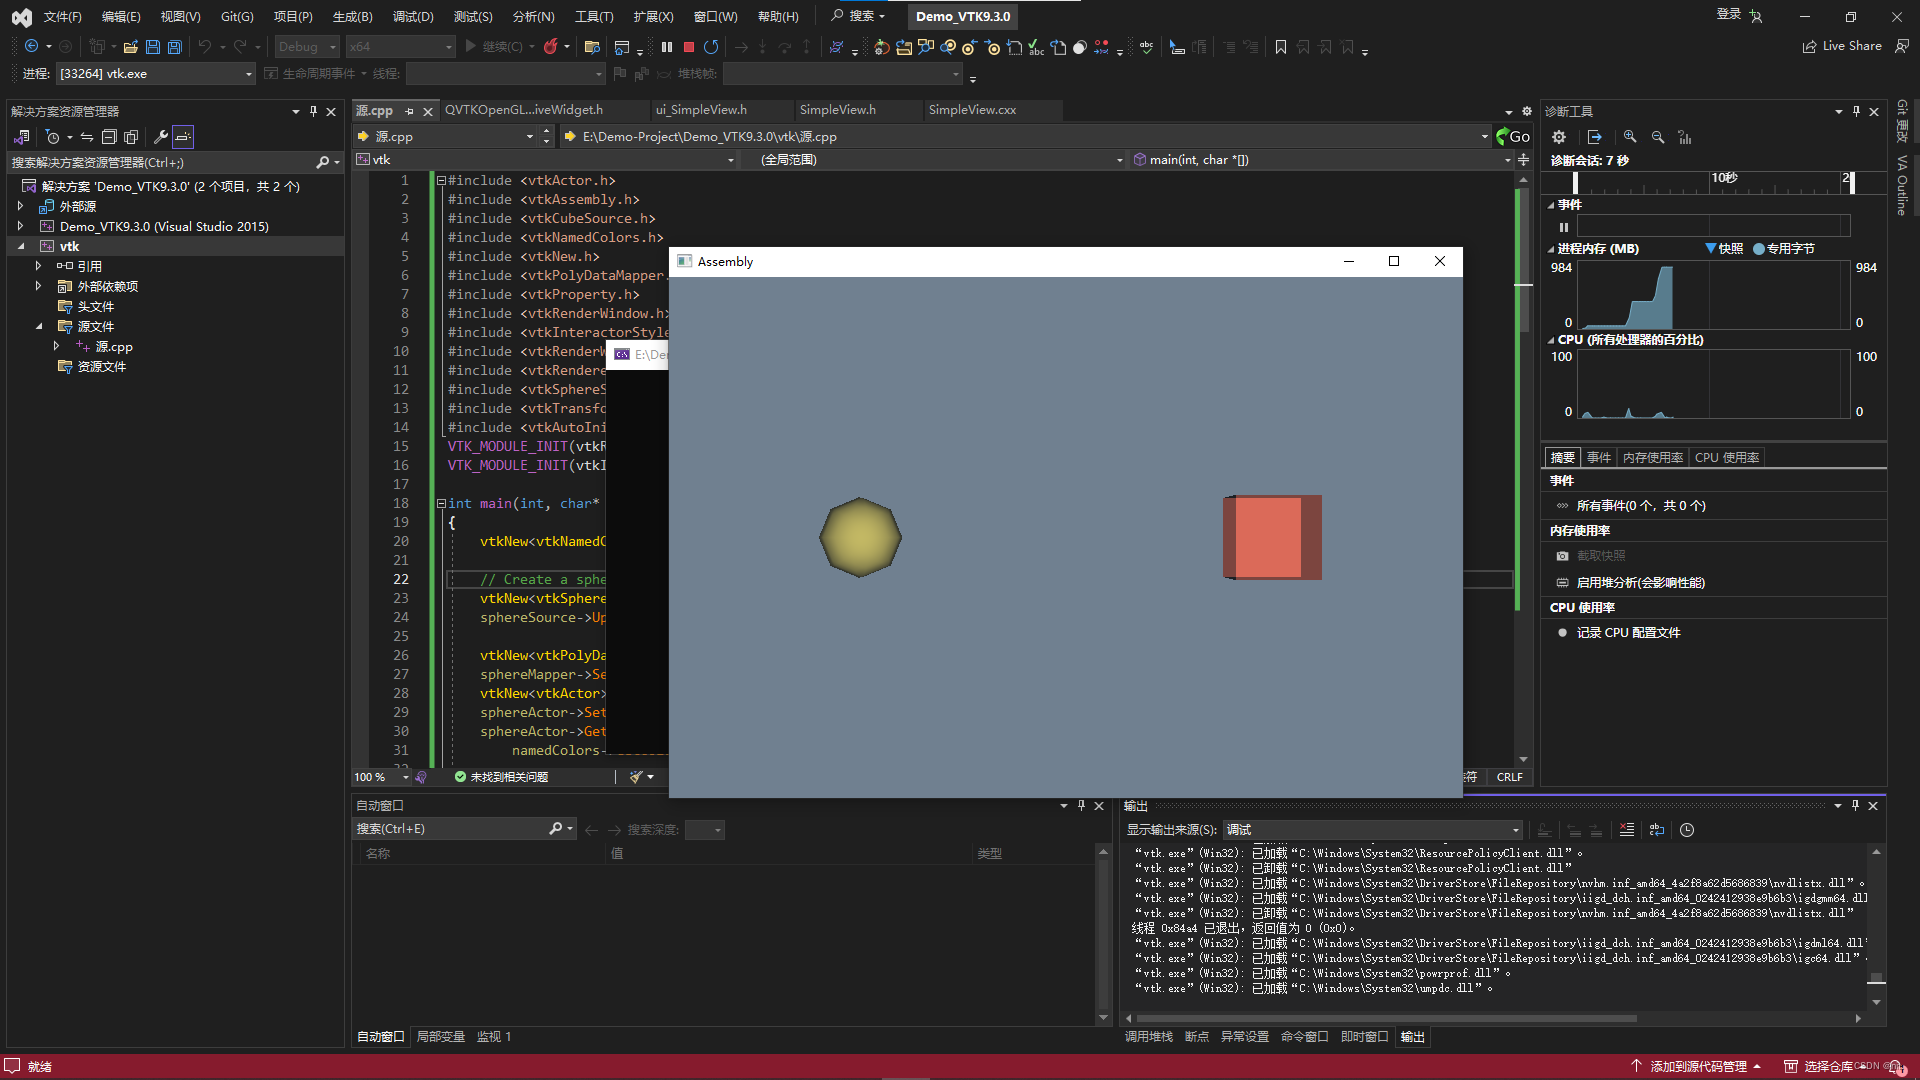
2.3 配置完成效果
经过上面的配置过程,vs2022对vtk9.3.0的配置已经完成。下面运行程序看执行效果。
鼠标左键可以拖动视角,滚珠可以对图形放大缩小。
有“AI”的1024 = 2048,欢迎大家加入2048 AI社区
更多推荐


 35
35 0
0- 0


 已为社区贡献3条内容

所有评论(0)