Flutter小知识:RichText(富文本标签)
Flutter小知识:RichText富文本标签苹果风格弹框RichText富文本标签仁义道德,也是一种奢侈。——疾风剑豪先来看看今天的效果:什么是富文本:富文本格式(Rich Text Format)即RTF格式,又称多文本格式,是由微软公司开发的跨平台文档格式。大多数的文字处理软件都能读取和保存RTF文档。富文本格式 (RTF) 是一种方便于不同的设备、系统查看的文本和图形文档格式。来自百度百
Flutter小知识:RichText富文本标签
仁义道德,也是一种奢侈。——疾风剑豪
先来看看今天的效果:
什么是富文本:
- 富文本格式(Rich Text Format)即RTF格式,又称多文本格式,是由微软公司开发的跨平台文档格式。大多数的文字处理软件都能读取和保存RTF文档。
- 富文本格式 (RTF) 是一种方便于不同的设备、系统查看的文本和图形文档格式。
来自百度百科
在Flutter中富文本指的就是多种文本格式
苹果风格弹框
  @override
  void initState() {
    super.initState();
     Future.delayed(new Duration(seconds: 0), () {
  		  showDialog();
 	   });
  }

  void showDialog() {
      showCupertinoDialog(
        context: context,
        builder: (BuildContext context) {
          return CupertinoAlertDialog(
            title: Text("温馨提示"),
            content: buildContent(context),
            actions: [
              CupertinoDialogAction(
                child: Text("取消"),
                onPressed: () {
                  Navigator.of(context).pop();
                },
              ),
              CupertinoDialogAction(
                child: Text("确定"),
                onPressed: () {
                  Navigator.of(context).pop();
                },
              ),
            ],
          );
        },
      );
  }
注意:
如果在initState()方法中使用context一定要把他放到队列中
   Future.delayed(new Duration(seconds: 0), () {
  		  showDialog();
 	   });
否则的话会提示一个错:
Typically references to inherited widgets should occur in widget build() methods. Alternatively, initialization based on inherited widgets can be placed in the didChangeDependencies method, which is called after initState and whenever the dependencies change thereafter.
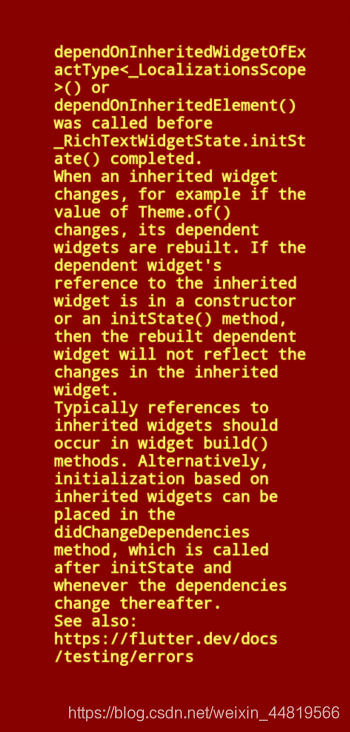
报这个错的原因是因为当创建Widget的时候,先创建的initState方法,此时还没有context,走到build方法才可以用context
使用苹果风格的弹框步骤很简单,也没几个参数,我就不带大家一一说了,需要注意的是context和builder参数是必传的即可
RichText富文本标签
加粗是必传参数:
| RichText参数 | 类型 | 说明 |
|---|---|---|
| overflow | TextOverflow | 对不可见文本操作 TextOverflow.ellipsis 以…显示不可见文本 TextOverflow.visible 只显示能看到的 TextOverflow.clip 减掉溢出文本(默认) TextOverflow.fade 将溢出的文本淡入透明。 (底部会带大家看每一个效果) |
| maxLines | int | 用来设置最大行数 |
| textAlign | TextAlign | 对齐属性 |
| textScaleFactor | double | 文字放大缩小倍数 |
| textDirection | TextDirection | 文本排列方式 TextDirection.rtl文本从右到左 TextDirection.ltr文本从左到右 |
| text | TextSpan | 必传参数,用来展示文本 |
| recognizer | TapGestureRecognizer | 手势监听 |
//协议说明文案
  String userPrivateProtocol =
      "我们一向尊重并会严格保护用户在使用本产品时的合法权益(包括用户隐私、用户数据等)不受到任何侵犯。本协议(包括本文最后部分的隐私政策)是用户(包括通过各种合法途径获取到本产品的自然人、法人或其他组织机构,以下简称“用户”或“您”)与我们之间针对本产品相关事项最终的、完整的且排他的协议,并取代、合并之前的当事人之间关于上述事项的讨论和协议。本协议将对用户使用本产品的行为产生法律约束力,您已承诺和保证有权利和能力订立本协议。用户开始使用本产品将视为已经接受本协议,请认真阅读并理解本协议中各种条款,包括免除和限制我们的免责条款和对用户的权利限制(未成年人审阅时应由法定监护人陪同),如果您不能接受本协议中的全部条款,请勿开始使用本产品";

 Widget buildContent(BuildContext context) {
    return Container(
      //ListView可滑动
      child: RichText(
        //必传文本
        text: new TextSpan(text: "请认真阅读并理解",style: TextStyle(color: Colors.grey),
            //手势监听
            // recognizer: ,
            children: [
              TextSpan(text: "<用户协议>",style: TextStyle(color: Colors.blueAccent),),
              TextSpan(text: "与",style: TextStyle(color: Colors.grey),),
              TextSpan(text: "<隐私协议>",style: TextStyle(color: Colors.blueAccent),),
              TextSpan(text: userPrivateProtocol,style: TextStyle(color: Colors.grey),)
        ]),
      ),
    );
  }
先来看看效果:效果图(1.1):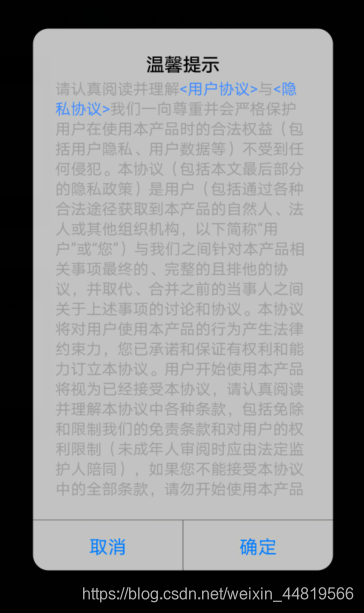
控制它的大小,并添加控制器:
//用来收手势监听
  TapGestureRecognizer _tgr1 = new TapGestureRecognizer();
  TapGestureRecognizer _tgr2 = new TapGestureRecognizer();

 Widget buildContent(BuildContext context) {
    return  Container(
      height: 200,
      //ListView可滑动
      child:ListView(
        children: [
          RichText(
            //TextOverflow.ellipsis ...文本
            //TextOverflow.visible  只显示能看到的
            //TextOverflow.clip  减掉溢出文本
            //TextOverflow.fade  将溢出的文本淡入透明。
            // overflow: TextOverflow.visible,
            // //设置最大行数
            // maxLines: 5,
            // //对齐属性
            // textAlign: TextAlign.right,
            // //文字放大缩小倍数,默认为1.0
            // textScaleFactor: 2,
            // textDirection:TextDirection.rtl,
            //必传文本
            text: new TextSpan(
                text: "请认真阅读并理解",
                style: TextStyle(color: Colors.grey),
                //手势监听
                // recognizer: ,
                children: [
                  TextSpan(
                      text: "<用户协议>",
                      style: TextStyle(color: Colors.blueAccent),
                      recognizer: _tgr1
                        ..onTap = () {
                          Toast.toast(context, msg: "用户协议");
                        }),
                  TextSpan(
                    text: "与",
                    style: TextStyle(color: Colors.grey),
                  ),
                  TextSpan(
                      text: "<隐私协议>",
                      style: TextStyle(color: Colors.blueAccent),
                      recognizer: _tgr2
                        ..onTap = () {
                          Toast.toast(context, msg: "隐私协议");
                        }),
                  TextSpan(
                    text: userPrivateProtocol,
                    style: TextStyle(color: Colors.grey),
                  )
                ]),
          )
        ],
      ),
    );
  }

  @override
  void dispose() {
    _tgr1.dispose();
    _tgr2.dispose();
    super.dispose();
  }
- 通过ListView包裹使RichText可滑动
- 通过设置Container设置RichText高度
- 通过TextSpan中的属性recognizer设置手势监听
大家记得在dispose()中销毁TapGestureRecognizer哦
在来看看效果:
效果图(1.2):

走到这里今天的效果就完成啦
咋们在看看RichText其他属性:
-
overflow: TextOverflow.ellipsis
效果图(1.3)
maxLines: 5效果图(1.3):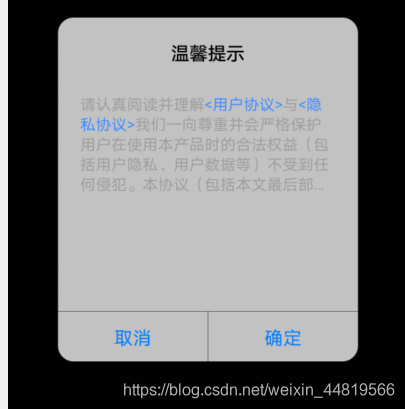
缺陷:滑动不起作用,常配合maxLines属性使用 -
overflow: TextOverflow.visible
效果图(1.4)效果图(1.4):
-
overflow: TextOverflow.fade
效果图(1.5)效果图(1.5)
其他属性:
			 //TextOverflow.ellipsis ...文本
            //TextOverflow.visible  只显示能看到的
            //TextOverflow.clip  减掉溢出文本
            //TextOverflow.fade  将溢出的文本淡入透明。
            overflow: TextOverflow.fade,
            // //设置最大行数
            maxLines: 5,
            // //对齐属性
            textAlign: TextAlign.right,
            // //文字放大缩小倍数,默认为1.0
            textScaleFactor: 2,
            textDirection: TextDirection.rtl,
效果图(1.6):
本章用到知识:
Flutter 插件:WebView与H5页面混合开发(flutter_webview_plugin)
原创不易,您的点赞就是对我最大的支持,留下您的点赞吧~
有“AI”的1024 = 2048,欢迎大家加入2048 AI社区
更多推荐


 2
2 0
0- 0


 已为社区贡献3条内容

所有评论(0)