Livox-mid360+PX4+XTDrone+Faster-lio仿真
Livox-mid360-PX4-XTDrone-Faster-lio仿真
由于本人的毕设做了几周的仿真,但是网上的资料比较有限又不是很清晰,导致中间踩了非常多的坑,甚至一整周都没有一点进展,所以趁着刚跑通整理了一下,包含相对详细的步骤,希望可以帮助大家少走亿点弯路。哪里有问题欢迎大家评论一起讨论。
文中的所需的文件都上传到了github,可以在文末找到链接
目录
一、准备
要配置好环境,包括ROS,Gazebo,Ubuntu系统,NVIDIA显卡驱动,MAVROS,PX4,XTDrone以及环境依赖,可以参考以下链接。
我的配置是:Ubuntu20.04,ros1-noetic,Gazebo11
二、将Livox-mid360安装到iris无人机模型上
Livox_mid360好像是根据Livox_mid40改的,所以他们俩都得改
最终的整个逻辑是这样,通过roslaunch px4 indoor1.launch生成地图,然后该launch文件中通过参数sdf选择iris_3d_lidar_360无人机,回头launch文件通过iris_3d_lidar_360.sdf文件将无人机加载进地图,而无人机的sdf文件又用include来引入了Mid360模型,通过Mid360文件夹下的Mid360.sdf再将mid360雷达加入无人机上,最终搭配了mid360的无人机同地图一起在gazebo中生成,所以我们按照这个逻辑来逐一改。
无人机模型和传感器模型都在PX4里,所以得到下面这个路径下
/home/ztl/PX4_Firmware/PX4_Firmware_13/Tools/sitl_gazebo/models复制一个无人机模型的文件夹,就比如iris_3d_lidar,然后重命名
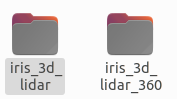
再修改iris_3d_lidar_360.sdf,这个文件定义了四旋翼的物理属性(质量、惯性矩阵)、动力系统(旋翼配置)及传感器接口(IMU、GPS等),并作为无人机的本体模型被实例化到场景中,其中我们关心的就是这个传感器接口。在sdf中加入如下代码来引入mid360,再屏蔽掉原始的雷达
添加雷达
    <include>
      <uri>model://Mid360</uri>
      <pose>0 0 0.05 0 0 0</pose>
    </include>

    <joint name="lidar_joint" type="fixed">
      <child>Mid360::livox_base</child>
      <parent>base_link</parent>
      <axis>
        <xyz>0 0 1</xyz>
        <limit>
          <upper>0</upper>
          <lower>0</lower>
        </limit>
      </axis>
    </joint>


582行左右要注释的雷达
    <!-- For Velodyne Lidar Payload -->
    <!-- <include>
      <uri>model://3d_lidar</uri>
      <pose>0 0 0.08 0 0 0</pose>
    </include>
    <joint name="lidar_joint" type="fixed">
      <child>3d_lidar::link</child>
      <parent>base_link</parent>
      <axis>
        <xyz>0 0 1</xyz>
        <limit>
          <upper>0</upper>
          <lower>0</lower>
        </limit>
      </axis>
    </joint> -->
    <!-- For Stereo Camera Payload -->
这样,无人机就引入了雷达,但是只是include了,还需要把这个雷达的文件拿过来
于是还是在models路径下添加文件夹,先添加Mid360文件夹,其中的sdf文件定义Livox Mid360雷达在Gazebo中的物理模型与传感器特性

修改Mid360模型文件<collision>、<visual>标签所引用的文件路径
<!--在collision标签使用livox_mid40.dae的原因,据gpt分析是为了简化碰撞体积的计算-->
<uri>model://livox_mid40/meshes/livox_mid40.dae</uri>
<uri>model://livox_mid40/meshes/mid360.dae</uri>
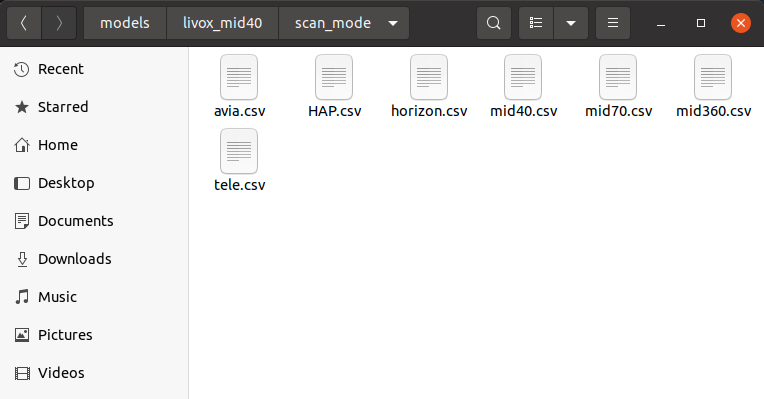
再修改<csv_file_name>路径
<csv_file_name>/home/byy/catkin_ws/src/livox_laser_simulation/scan_mode/mid360.csv</csv_file_name>
最后再补充livox_mid40文件夹的东西

最后再在indoor1.launch中把sdf换成咱们的无人机,到此就把mid360添加到无人机上,验证一下
roslaunch px4 indoor1.launch如果配置成功无人机应该是下面的样子
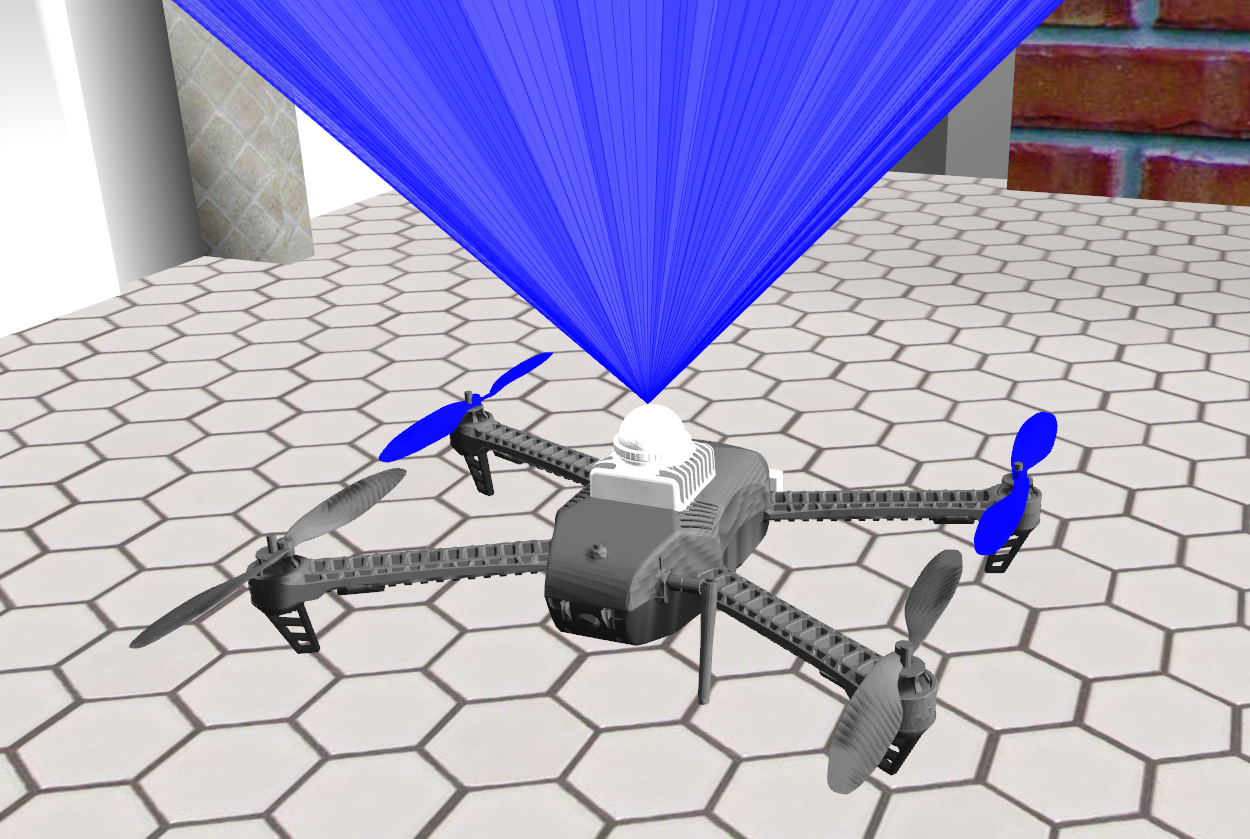
正常来说应该没有上面蓝色的线,因为到现在为止,只是把雷达的模型加载到了无人机上,要想让他工作还要使用驱动。
三、安装Mid360雷达驱动和Livox雷达仿真库
这里注意,livox雷达驱动分为livox_ros_driver和livox_ros_driver2,以及对应的SDK,这里我们要用的是Mid360,所以要下载livox_ros_driver2和Livox-SDK2,且工作空间中尽量不要把两种驱动都安,有可能出现冲突。
3.1安装Mid360雷达驱动
cd ~/工作空间/src/
git clone https://github.com/Livox-SDK/livox_ros_driver2.git
git clone https://github.com/Livox-SDK/Livox-SDK2.git

cd ./Livox-SDK2/
mkdir build
cd build
cmake .. && make -j
sudo make install

cd ../livox_ros_driver2
source /opt/ros/noetic/setup.sh
./build.sh ROS1
如果出现了这个报错,那就先给livox_laser_simulation删了,或者移到其他地方,因为这个库是基于livox_ros_driver1来写的,里面很多地方得全部改成livox_ros_driver2,我们后面再改,现在先让驱动编译通过了。
3.2安装Livox雷达仿真库
cd ~/catkin_ws/src
git clone https://github.com/Luchuanzhao/Livox_simulation_customMsg
mv Livox_simulation_customMsg livox_laser_simulation
#修改激光雷达文件路径
cd ~/catkin_ws/src/livox_laser_simulation/src
code livox_points_plugin.cpp
#将第54行的内容改为自己电脑实际的csv文件路径
#例如:/home/ztl/catkin_ws/src/livox_laser_simulation/scan_mode/mid360.csv

#将101行改为自己需要的点云格式:0->PointCloud;1/2->PointCloud2;3->CustomMsg
#如果后续要使用Faster-LIO,需使用CustomMsg

还需注释掉340、341行的坐标变换代码,要不然rviz中得不到图像
//tfBroadcaster->sendTransform(
//   tf::StampedTransform(tf, ros::Time::now(), raySensor->ParentName(), raySensor->Name()));

#编译
cd ~/catkin_ws
catkin_make
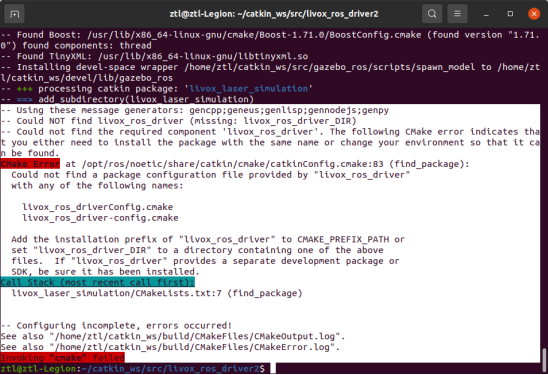
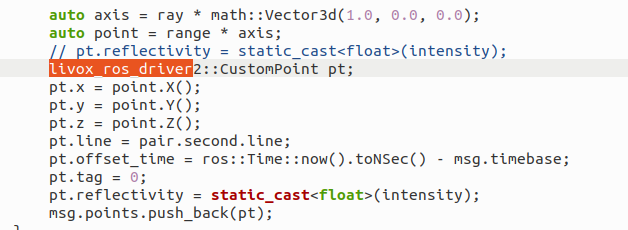
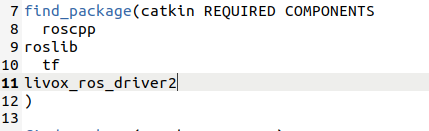
到这一步一定会报错,说livox_ros_driver找不到,如上上图所示,所以我们开始改文件,将livox_laser_simulation的src,include,以及Cmakelists.txt等的driver都改成driver2,反正说哪个路径不对就改哪个路径的文件,直到工作空间编译通过。

编译通过后,重新打开indoor1.launch,会发现蓝线出现了,可以通过rostopic list查看一下,是不是/scan(雷达点晕数据)和/iris_0/imu_gazebo都有了,也可以在echo订阅下,看看是不是有数据
四、Faster-lio实现
这一节就要实现把激光雷达扫出来的点云数据和imu数据给到faster-lio让他建图
安装依赖
sudo apt-get install libgoogle-glog-dev
sudo apt-get install libeigen3-dev
sudo apt-get install libpcl-dev
sudo apt-get install libyaml-cpp-dev
查看编译器版本,faster-lio需要g++和gcc都9.0以上
g++ --version
gcc --version
升级编译器
sudo add-apt-repository ppa:ubuntu-toolchain-r/test
sudo apt-get update
sudo apt install gcc-9
sudo apt install g++-9
cd /usr/bin
sudo rm gcc g++
sudo ln -s gcc-9 gcc
sudo ln -s g++-9 g++
安装tbb库
cd ~
wget https://github.com/intel/tbb/archive/2019_U8.tar.gz
tar zxvf 2019_U8.tar.gz
rm 2019_U8.tar.gz
cd oneTBB-2019_U8
cp build/linux.gcc.inc build/linux.gcc-9.inc
code -n build/linux.gcc-9.inc
#对文本内容进行修改
CPLUS ?= g++-9
CONLY ?= gcc-9
#编译
make compiler=gcc-9 stdver=c++17 tbb_build_prefix=my_tbb_build
将tbb安装到系统
sudo mkdir /usr/local/tbb-2019_U8
sudo cp -r include /usr/local/tbb-2019_U8/include
sudo ln -s /usr/local/tbb-2019_U8/include/tbb /usr/local/include/tbb
sudo cp -r build/my_tbb_build_release /usr/local/tbb-2019_U8/lib
sudo ln -s /usr/local/tbb-2019_U8/lib/libtbb.so.2 /usr/local/lib/libtbb.so
sudo ln -s /usr/local/tbb-2019_U8/lib/libtbbmalloc.so.2 /usr/local/lib/libtbbmalloc.so
sudo ln -s /usr/local/tbb-2019_U8/lib/libtbbmalloc_proxy.so.2      /usr/local/lib/libtbbmalloc_proxy.so
 #“export ....”下面这一句话写入.bashrc
echo'export LD_LIBRARY_PATH=/usr/local/tbb-2019_U8/lib:$LD_LIBRARY_PATH'  >>      ~/.bashrc
source ~/.bashrc
安装faster-lio
cd ~/catkin_ws/src
git clone https://github.com/gaoxiang12/faster-lio.git
#编译
cd ~/catkin_ws
catkin_make
cd ~/catkin_ws/src/faster-lio/src
gedit CMakeLists.txt
#将target_link_libraries中的tbb更改为具体的库路径
/usr/local/lib/libtbb.so
/usr/local/lib/libtbbmalloc.so
/usr/local/lib/libtbbmalloc_proxy.so
最终形式
target_link_libraries(${PROJECT_NAME}
        ${catkin_LIBRARIES}
        ${PCL_LIBRARIES}
        ${PYTHON_LIBRARIES}
		/usr/local/lib/libtbb.so
		/usr/local/lib/libtbbmalloc.so
		/usr/local/lib/libtbbmalloc_proxy.so
        glog
        yaml-cpp
        )
修改激光雷达扫描模式的路径
cd ~/catkin_ws/src/livox_laser_simulation/src
vim livox_points_plugin.cpp
#将第54行的内容改为自己电脑实际的csv文件路径
#例如(/home/ztl/catkin_ws/src/livox_laser_simulation/scan_mode/mid360.csv)
进一步修改
#由于前面已经安装了livox_ros_driver2,所以将faster-lio/thirdparty/livox_ros_driver删除
cd ~/catkin_ws/src/faster-lio/thirdparty
rm -rf livox_ros_driver
#再将faster-lio下的CMakeLists的部分内容注释掉
cd ~/catkin_ws/src/faster-lio
gedit CMakeLists.txt
#将第15行的add_subdirectory(thirdparty/livox_ros_driver)注释掉,保存
修改配置文件 ,mid360.yaml配置了Faster-LIO算法对mid360的参数体系(传感器参数、噪声模型、外参标定等)
cd ~/catkin_ws/src/faster-lio/config/
gedit mid360.yaml
common:
    lid_topic:  "/scan"
    imu_topic:  "/iris_0/imu_gazebo"
    time_sync_en: false
    time_offset_lidar_to_imu: 0.0 # Time offset between lidar and IMU calibrated by other algorithms, e.g. LI-Init (can be found in README).
                                  # This param will take effect no matter what time_sync_en is. So if the time offset is not known exactly, please set as 0.0

preprocess:
    lidar_type: 1                # 1 for Livox serials LiDAR, 2 for Velodyne LiDAR, 3 for ouster LiDAR,
    scan_line: 4
    blind: 0.5

mapping:
    acc_cov: 0.1
    gyr_cov: 0.1
    b_acc_cov: 0.0001
    b_gyr_cov: 0.0001
    fov_degree:    360
    det_range:     100.0
    extrinsic_est_en:  false      # true: enable the online estimation of IMU-LiDAR extrinsic
    extrinsic_T: [ -0.011, -0.02329, 0.04412 ]
    extrinsic_R: [ 1, 0, 0,
                   0, 1, 0,
                   0, 0, 1]

publish:
    path_en:  false
    scan_publish_en:  true       # false: close all the point cloud output
    dense_publish_en: true       # false: low down the points number in a global-frame point clouds scan.
    scan_bodyframe_pub_en: true  # true: output the point cloud scans in IMU-body-frame

pcd_save:
    pcd_save_en: true
    interval: -1                 # how many LiDAR frames saved in each pcd file;
                                 # -1 : all frames will be saved in ONE pcd file, may lead to memory crash when having too much frames.
添加launch文件,去faster-lio/launch下新建一个mapping_mid360.launch文件,也可以直接去我的github下下来
<launch>
<!-- Launch file for Livox MID360 LiDAR -->

	<arg name="rviz" default="true" />

	<rosparam command="load" file="$(find faster_lio)/config/mid360.yaml" />

	<param name="feature_extract_enable" type="bool" value="0"/>
	<param name="point_filter_num_" type="int" value="3"/>
	<param name="max_iteration" type="int" value="3" />
	<param name="filter_size_surf" type="double" value="0.5" />
	<param name="filter_size_map" type="double" value="0.5" />
	<param name="cube_side_length" type="double" value="1000" />
	<param name="runtime_pos_log_enable" type="bool" value="1" />
    <node pkg="faster_lio" type="run_mapping_online" name="laserMapping" output="screen" />

	<group if="$(arg rviz)">
	<node launch-prefix="nice" pkg="rviz" type="rviz" name="rviz" args="-d $(find faster_lio)/rviz_cfg/loam_livox.rviz" />
	</group>

</launch>
这时候进工作空间进行编译,会报错,说livox_ros_driver没找到,根据上一节一样,说哪不对,就改哪,驱动1换驱动2,直到工作空间通过。
五、验证
这时候打开终端进行紧张刺激的验证吧
roslaunch px4 indoor1.launch

roslaunch faster_lio mapping_mid360.launch

cd ~/XTDrone/sensing/slam/laser_slam/script
python3 laser_transfer.py iris 0 aloam

cd ~/XTDrone/communication
python3 multirotor_communication.py iris 0

cd ~/XTDrone/control/keyboard
python3 multirotor_keyboard_control.py iris 1 vel
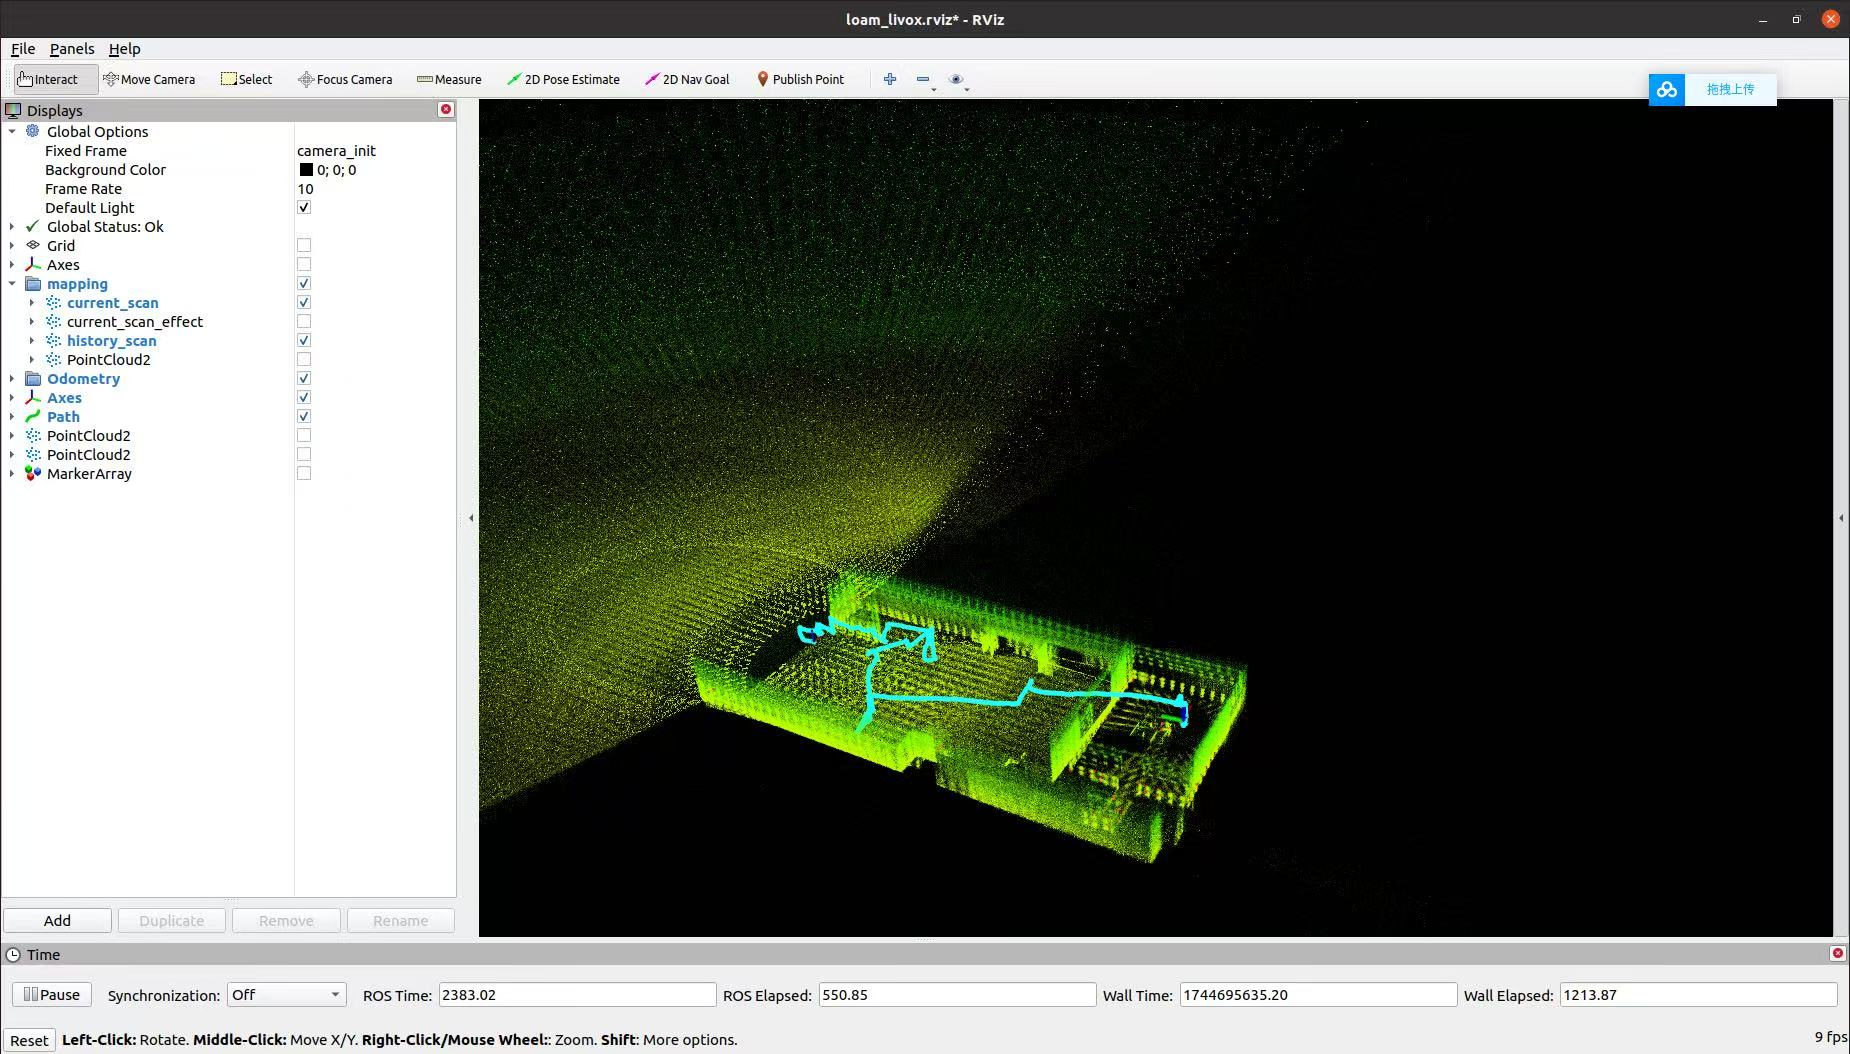
最终我在indoor1中的效果是这样的
PCD文件夹下可以看到自动保存的点云地图,会好看点
sudo apt install pcl-tools  # 包含pcl_viewer
pcl_viewer your_file.pcd    # 需要进入到PCD路径下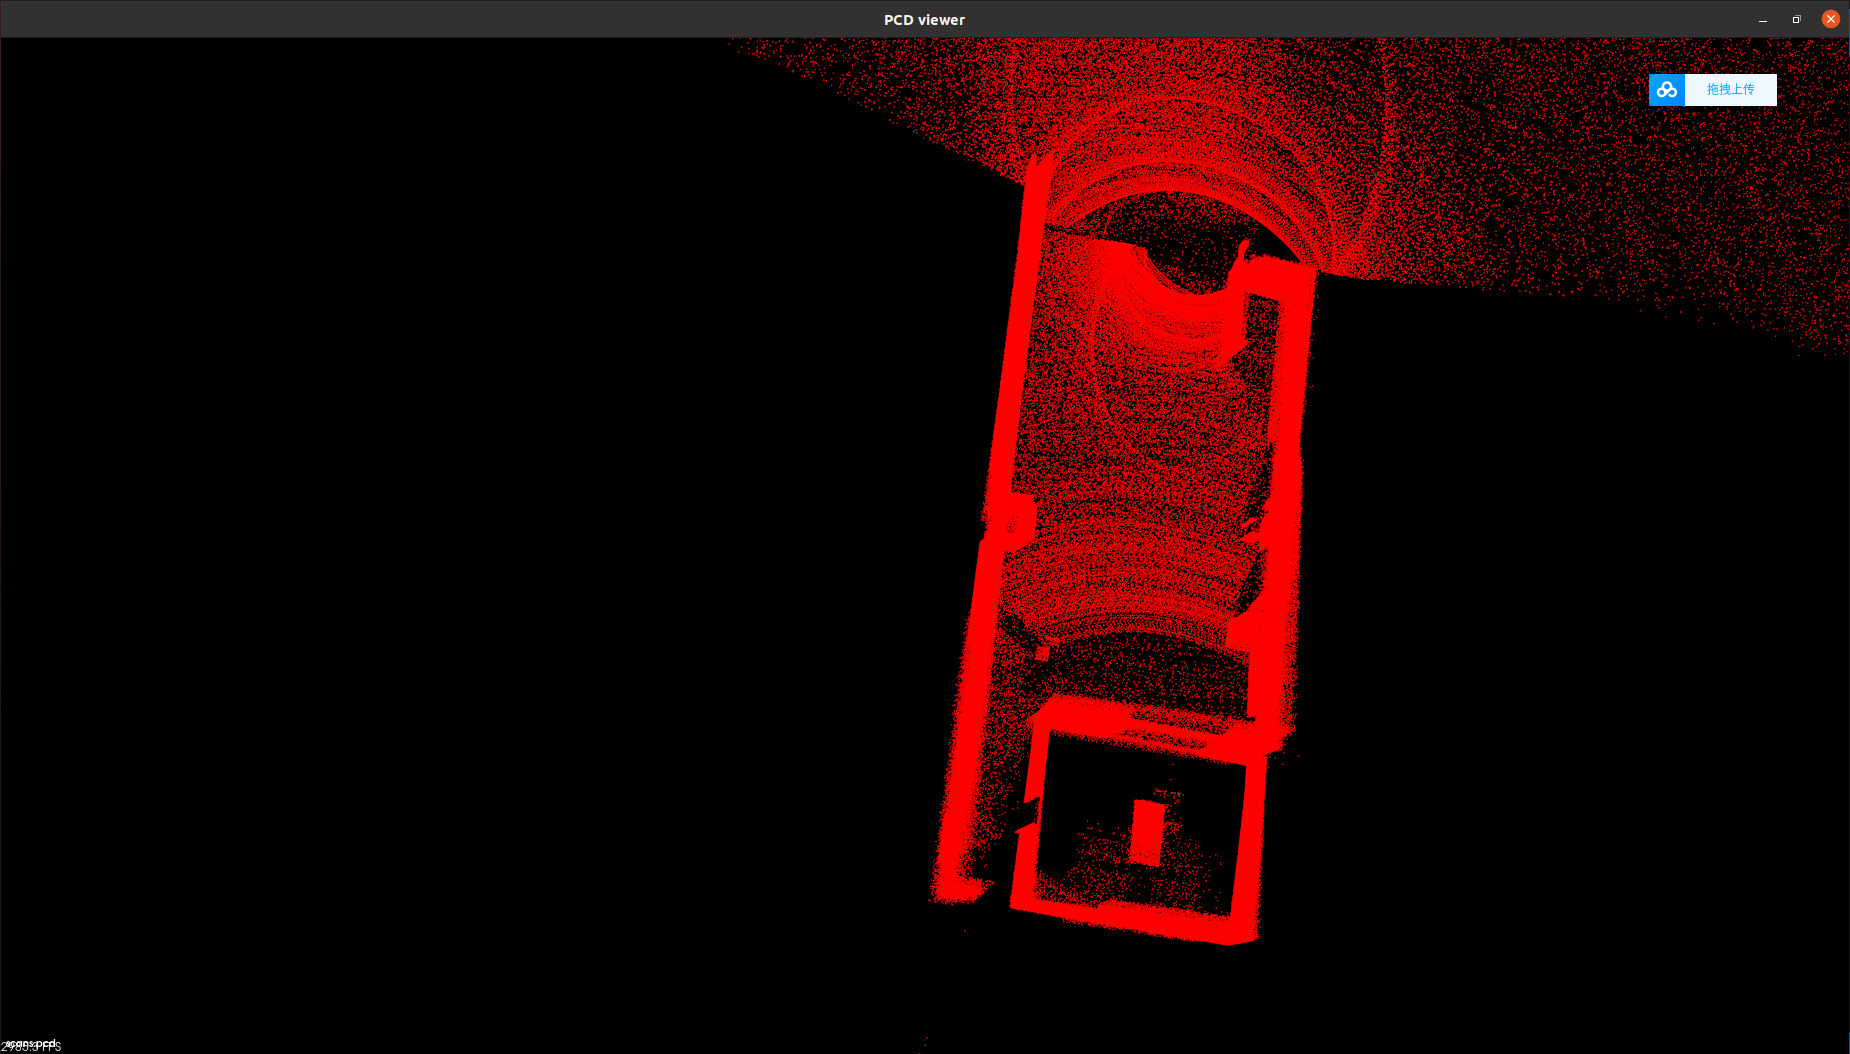
六、配置过程中的参考
Faster-LIO+Livox-mid360+XTDrone仿真搭建
巨耐心的MYY师兄
有“AI”的1024 = 2048,欢迎大家加入2048 AI社区
更多推荐


 30
30 0
0- 0


 已为社区贡献4条内容

所有评论(0)