双目点云重建全过程,附代码
本人正在做毕设,需要得到高精度的点云(亚毫米)用于点云配准,参考立体视觉几何 (三)-CSDN博客,由于zed相机的焦距的焦距较短(2.1mm)深度不确定度过大,下一步考虑使用海康工业相机,亲们如果有这方面的见解欢迎交流!
·
1.单目标定
calibration.py
import numpy as np
import cv2
import glob

def calibrate_camera(square_size, width, height, image_folder):
    objp = np.zeros((width*height, 3), np.float32)
    # 将世界坐标系建在标定板上,所有点的Z坐标全部为0,所以只需要赋值x和y
    objp[:,:2] = np.mgrid[0:width,0:height].T.reshape(-1,2) * square_size

    # 保存角点的数组
    objpoints = [] # 3d point in real world space
    imgpoints = [] # 2d points in image plane.

    # 读取图像文件

    images = glob.glob(f'{image_folder}/*.png')

    criteria = (cv2.TERM_CRITERIA_EPS + cv2.TERM_CRITERIA_MAX_ITER, 30, 0.001)

    for fname in images:
        img = cv2.imread(fname)
        gray = cv2.cvtColor(img, cv2.COLOR_BGR2GRAY)

        # 查找棋盘格角点
        ret, corners = cv2.findChessboardCorners(gray, (width,height), None)

        # 如果找到了,添加物理坐标和图像坐标
        if ret == True:
            objpoints.append(objp) #物理坐标的z都为0
            corners2 = cv2.cornerSubPix(gray,corners, (11,11), (-1,-1), criteria)
            imgpoints.append(corners2)

            # 可以选择绘制并显示角点
            cv2.drawChessboardCorners(img, (width,height), corners2, ret)
            cv2.namedWindow('img', cv2.WINDOW_NORMAL)
            cv2.imshow('img', img)
            cv2.waitKey(200)

    cv2.destroyAllWindows()

    # 标定
    ret, mtx, dist, rvecs, tvecs = cv2.calibrateCamera(objpoints, imgpoints, gray.shape[::-1], None, None)

    print("Camera matrix : \n", mtx)
    print("dist : \n", dist)
    print("rvecs : \n", rvecs)
    print("tvecs : \n", tvecs)

    # 保存内参矩阵和畸变系数到文件
    # np.savez('calibration_data_right.npz', mtx=mtx, dist=dist)

    return {"mtx": mtx, "dist": dist, "rvecs": rvecs, "tvecs": tvecs}


def main():
    # 准备标定板上角点的物理坐标,假设标定板正好在世界坐标系的原点,
    # 例如,使用一个标准的棋盘格标定板,每个格子的大小为square_size,
    # 棋盘格的大小为 (width, height)。
    square_size = 2.0
    width, height = 11, 8
    image_folder = 'dataset/right'
    calibration_data = calibrate_camera(square_size, width, height, image_folder)


    # Save calibration data to file
    # **操作符:在Python中,**操作符用于将字典的键值对解包为关键字参数。这意味着如果你有一个字典,其键值对可以直接作为函数的关键字参数传递。
    np.savez('calibration_data_right.npz', **calibration_data)

if __name__ == "__main__":
    main()
2.双目标定
import numpy as np
import cv2
import glob
import math

def load_calibration_data(left_calib_file, right_calib_file):
    # 从文件加载相机标定数据
    left_data = np.load(left_calib_file)
    right_data = np.load(right_calib_file)
    return left_data['mtx'], left_data['dist'], right_data['mtx'], right_data['dist']

def find_chessboard_corners(images_left, images_right, pattern_size, square_size):
    # 查找棋盘格角点
    obj_points = [] # 真实世界空间中的3d点
    img_points_left = [] # 图像平面中的2d点
    img_points_right = []
    pattern_points = np.zeros((np.prod(pattern_size), 3), np.float32)
    pattern_points[:, :2] = np.indices(pattern_size).T.reshape(-1, 2) * square_size

    for img_left_path, img_right_path in zip(images_left, images_right):
        img_left = cv2.imread(img_left_path, cv2.IMREAD_GRAYSCALE)
        img_right = cv2.imread(img_right_path, cv2.IMREAD_GRAYSCALE)
        found_left, corners_left = cv2.findChessboardCorners(img_left, pattern_size)
        found_right, corners_right = cv2.findChessboardCorners(img_right, pattern_size)

        if found_left and found_right:
            term = (cv2.TERM_CRITERIA_EPS + cv2.TERM_CRITERIA_COUNT, 30, 0.1)
            cv2.cornerSubPix(img_left, corners_left, (5, 5), (-1, -1), term)
            cv2.cornerSubPix(img_right, corners_right, (5, 5), (-1, -1), term)

            img_points_left.append(corners_left.reshape(-1, 2))
            img_points_right.append(corners_right.reshape(-1, 2))
            obj_points.append(pattern_points)

    return obj_points, img_points_left, img_points_right

def stereo_calibrate_cameras(obj_points, img_points_left, img_points_right, mtx_left, dist_left, mtx_right, dist_right, image_size):
    # 对相机进行立体标定
    flags = cv2.CALIB_FIX_INTRINSIC
    criteria = (cv2.TERM_CRITERIA_EPS + cv2.TERM_CRITERIA_MAX_ITER, 100, 1e-5)
    ret, mtx_left, dist_left, mtx_right, dist_right, R, T, E, F = cv2.stereoCalibrate(
        obj_points, img_points_left, img_points_right, mtx_left, dist_left, mtx_right, dist_right, image_size,
        flags=flags, criteria=criteria)
    return R, T

def calculate_camera_distance(T):
    # 计算相机之间的距离
    return math.sqrt(T[0]**2 + T[1]**2 + T[2]**2)

def main():
    square_size = 2.0 # 棋盘格方格的实际大小
    pattern_size = (11, 8) # 棋盘格模式大小
    images_left = glob.glob('dataset/left/*.png') # 左侧图像路径
    images_right = glob.glob('dataset/right/*.png') # 右侧图像路径
    mtx_left, dist_left, mtx_right, dist_right = load_calibration_data('calibration_data_left.npz', 'calibration_data_right.npz')

    # 获取图像大小
    sample_image = cv2.imread(images_left[0])
    image_size = sample_image.shape[::-1][1:] # (width, height)

    # 查找棋盘格角点
    obj_points, img_points_left, img_points_right = find_chessboard_corners(images_left, images_right, pattern_size, square_size)
    # 进行立体标定
    R, T = stereo_calibrate_cameras(obj_points, img_points_left, img_points_right, mtx_left, dist_left, mtx_right, dist_right, image_size)

    # 计算相机距离
    distance = calculate_camera_distance(T)
    print("Camera distance:", distance, "cm")
    print("R:",R)
    np.savez("stereocali.npz", R=R, T=T)


if __name__ == "__main__":
    main()
3.双目校正
import numpy as np
import cv2

def load_calibration_data(left_calibration_path, right_calibration_path, stereo_calibration_path):
    # 加载单目校准数据
    left_data = np.load(left_calibration_path)
    right_data = np.load(right_calibration_path)

    # 加载立体校准数据
    stereo_data = np.load(stereo_calibration_path)

    return left_data['mtx'], left_data['dist'], right_data['mtx'], right_data['dist'], stereo_data['R'], stereo_data['T']

def stereo_rectify(mtx_left, dist_left, mtx_right, dist_right, R, T, image_size, alpha=1):
    # 计算校正变换
    R1, R2, P1, P2, Q, validPixROI1, validPixROI2 = cv2.stereoRectify(
        mtx_left, dist_left, mtx_right, dist_right, image_size, R, T, alpha)
    return R1, R2, P1, P2, Q

def init_undistort_rectify_map(mtx, dist, R, P, image_size):
    # 计算畸变校正和立体校正的映射矩阵
    mapx, mapy = cv2.initUndistortRectifyMap(mtx, dist, R, P, image_size, cv2.CV_32FC1)
    return mapx, mapy

def rectify_images(left_img_path, right_img_path, map1x, map1y, map2x, map2y):
    # 读取图像
    left_img = cv2.imread(left_img_path)
    right_img = cv2.imread(right_img_path)

    # 应用映射进行畸变校正和立体校正
    rectified_left = cv2.remap(left_img, map1x, map1y, cv2.INTER_LINEAR)
    rectified_right = cv2.remap(right_img, map2x, map2y, cv2.INTER_LINEAR)

    return rectified_left, rectified_right

def main():
    left_calibration_path = 'calibration_data_left.npz'
    right_calibration_path = 'calibration_data_right.npz'
    stereo_calibration_path = 'stereocali.npz'
    left_img_path = "testleft.png"
    right_img_path = "testright.png"
    image_size = (1242, 2208)

    # 加载校准数据
    mtx_left, dist_left, mtx_right, dist_right, R, T = load_calibration_data(
        left_calibration_path, right_calibration_path, stereo_calibration_path)

    # 计算立体校正参数
    R1, R2, P1, P2, Q = stereo_rectify(mtx_left, dist_left, mtx_right, dist_right, R, T, image_size)

    # 初始化畸变校正映射
    map1x, map1y = init_undistort_rectify_map(mtx_left, dist_left, R1, P1, image_size)
    map2x, map2y = init_undistort_rectify_map(mtx_right, dist_right, R2, P2, image_size)
    np.savez('calibration_maps.npz', map1x=map1x, map1y=map1y, map2x=map2x, map2y=map2y)

    # 校正图像
    rectified_left, rectified_right = rectify_images(left_img_path, right_img_path, map1x, map1y, map2x, map2y)

    # 保存和显示校正后的图像
    cv2.imwrite("rectified_left.png", rectified_left)
    cv2.imwrite("rectified_right.png", rectified_right)

    concat = cv2.hconcat([rectified_left, rectified_right])

    i = 0
    while (i < 1242):
        cv2.line(concat, (0,i), (4894,i), (0, 255, 0))
        i += 50
    cv2.imwrite('rectified.png',concat)
    cv2.imshow("rectified", concat)
    cv2.waitKey(0)
    cv2.destroyAllWindows()

    print("Q:",Q)

if __name__ == "__main__":
    main()
4.视差调参
import numpy as np
import cv2

def compute_disparity(img_left, img_right, num_disparities, block_size):
    """
    使用StereoSGBM算法计算视差图。
    """
    # 确保block_size是奇数
    if block_size % 2 == 0:
        block_size += 1
    if block_size < 5:
        block_size = 5

    # 初始化StereoSGBM对象
    stereo = cv2.StereoSGBM_create(minDisparity=0, numDisparities=16 * num_disparities, blockSize=block_size)
    # 计算视差
    disparity = stereo.compute(img_left, img_right)
    return disparity

def adjust_disparity_parameters(window_name, img_left, img_right):
    """
    创建滑动条用于调整视差参数,并显示视差图。
    """
    cv2.namedWindow(window_name,cv2.WINDOW_NORMAL)
    cv2.createTrackbar('num', window_name, 2, 10, lambda x: None)
    cv2.createTrackbar('blockSize', window_name, 5, 25, lambda x: None)

    app = 0
    while True:
        # 读取滑动条位置
        num = cv2.getTrackbarPos('num', window_name)
        block_size = cv2.getTrackbarPos('blockSize', window_name)

        # 计算视差
        disparity = compute_disparity(img_left, img_right, num, block_size)

        if app == 0:
            print('视差图维度: ' + str(disparity.ndim))
            print(type(disparity))
            max_index = np.unravel_index(np.argmax(disparity, axis=None), disparity.shape)
            app = 1

        # 视差图归一化
        disparity_normalized = cv2.normalize(disparity, None, alpha=0, beta=255, norm_type=cv2.NORM_MINMAX, dtype=cv2.CV_8U)
        disparity_color = cv2.applyColorMap(disparity_normalized, 2)

        cv2.namedWindow(window_name, cv2.WINDOW_NORMAL)
        cv2.imshow(window_name, disparity_color)

        if cv2.waitKey(1) & 0xFF == ord('q'):
            break

    cv2.destroyAllWindows()

def main():
    # 加载校正后的左右图像
    img_left = cv2.imread('rectified_left.png', 0)
    img_right = cv2.imread('rectified_right.png', 0)

    # 调整视差参数并计算视差图
    adjust_disparity_parameters('SGBM', img_left, img_right)

if __name__ == "__main__":
    main()
5.获得深度图生成点云(ZED相机实现)
import cv2
import numpy as np
import open3d as o3d
def load_maps(filename):
"""加载立体校正映射数据。"""
data = np.load(filename)
return data['map1x'], data['map1y'], data['map2x'], data['map2y']
img = cv2.imread("testminxing.png")
img_left = img[0:1242, 0:2208]
img_right = img[0:1242, 2208:4416]
map1x, map1y, map2x, map2y = load_maps("calibration_maps.npz")
img_left_rectified = cv2.remap(img_left, map1x, map1y, cv2.INTER_LINEAR)
img_right_rectified = cv2.remap(img_right, map2x, map2y,cv2.INTER_LINEAR)
img_color = cv2.cvtColor(img_left_rectified, cv2.COLOR_BGR2RGB)
print(img_color.shape)
imgL = cv2.cvtColor(img_left_rectified, cv2.COLOR_BGR2GRAY)
imgR = cv2.cvtColor(img_right_rectified, cv2.COLOR_BGR2GRAY)
num = 10 # numDisparities(视差范围数量)
blockSize = 20 # blockSize(块大小)
#SGBM算法算出的视差值会乘以16
stereo = cv2.StereoSGBM_create(minDisparity=0, numDisparities=16 * num, blockSize=blockSize)
disparity = stereo.compute(imgL, imgR)
dis_color = disparity
dis_color = cv2.normalize(dis_color, None, alpha=0, beta=255, norm_type=cv2.NORM_MINMAX, dtype = cv2.CV_8U)
dis_color = cv2.applyColorMap(dis_color, 2)
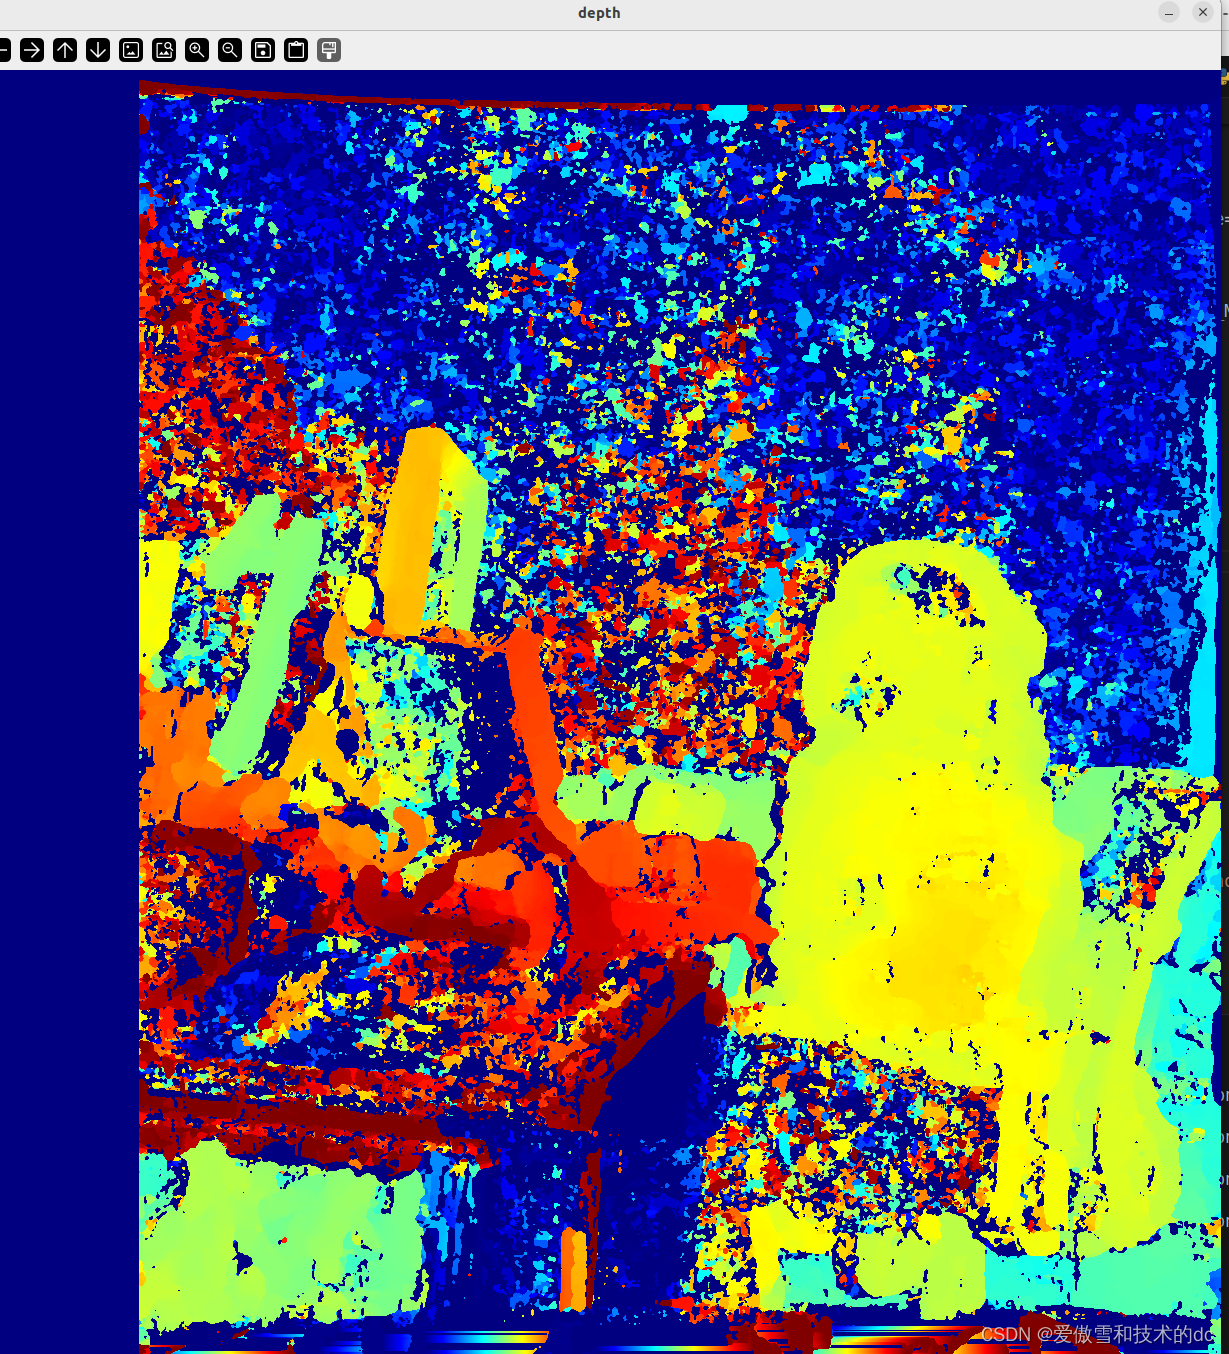
cv2.imshow("depth", dis_color)
cv2.waitKey(0)
cv2.destroyWindow("depth")
b= 11.97 # 相机之间的基线距离
f = 1910 # 相机的焦距
cx, cy = 1138, 651 # 主点
i = 0
output_points = np.zeros((2208 * 1242, 6))
for row in range(disparity.shape[0] - 1):
for col in range(disparity.shape[1] - 1):
dis = disparity[row][col]
if dis != 0 and dis != (-16) and dis > 1200 and dis < 1700:
if i < len(output_points):
output_points[i][0] = 16*b*(col-cx)/dis
output_points[i][1] = 16*b*(row-cy)/dis
output_points[i][2] = 16*b*f/dis
output_points[i][3] = img_color[row][col][0]
output_points[i][4] = img_color[row][col][1]
output_points[i][5] = img_color[row][col][2]
i += 1
else:
print(f"Warning: Trying to access index {i}, which is out of bounds.")
# 根据需要处理数组越界的情况,例如通过中断循环或其他方式
output_points = output_points[:i] # 仅保存非零点
def create_output(vertices, filename):
ply_header = '''ply
format ascii 1.0
element vertex %(vert_num)d
property float x
property float y
property float z
property uchar red
property uchar green
property uchar blue
end_header
'''
with open(filename,'w') as file:
file.write(ply_header%dict(vert_num = len(vertices)))
np.savetxt(file, vertices, '%f %f %f %d %d %d')
output_file = 'dc.ply'
create_output(output_points, output_file)
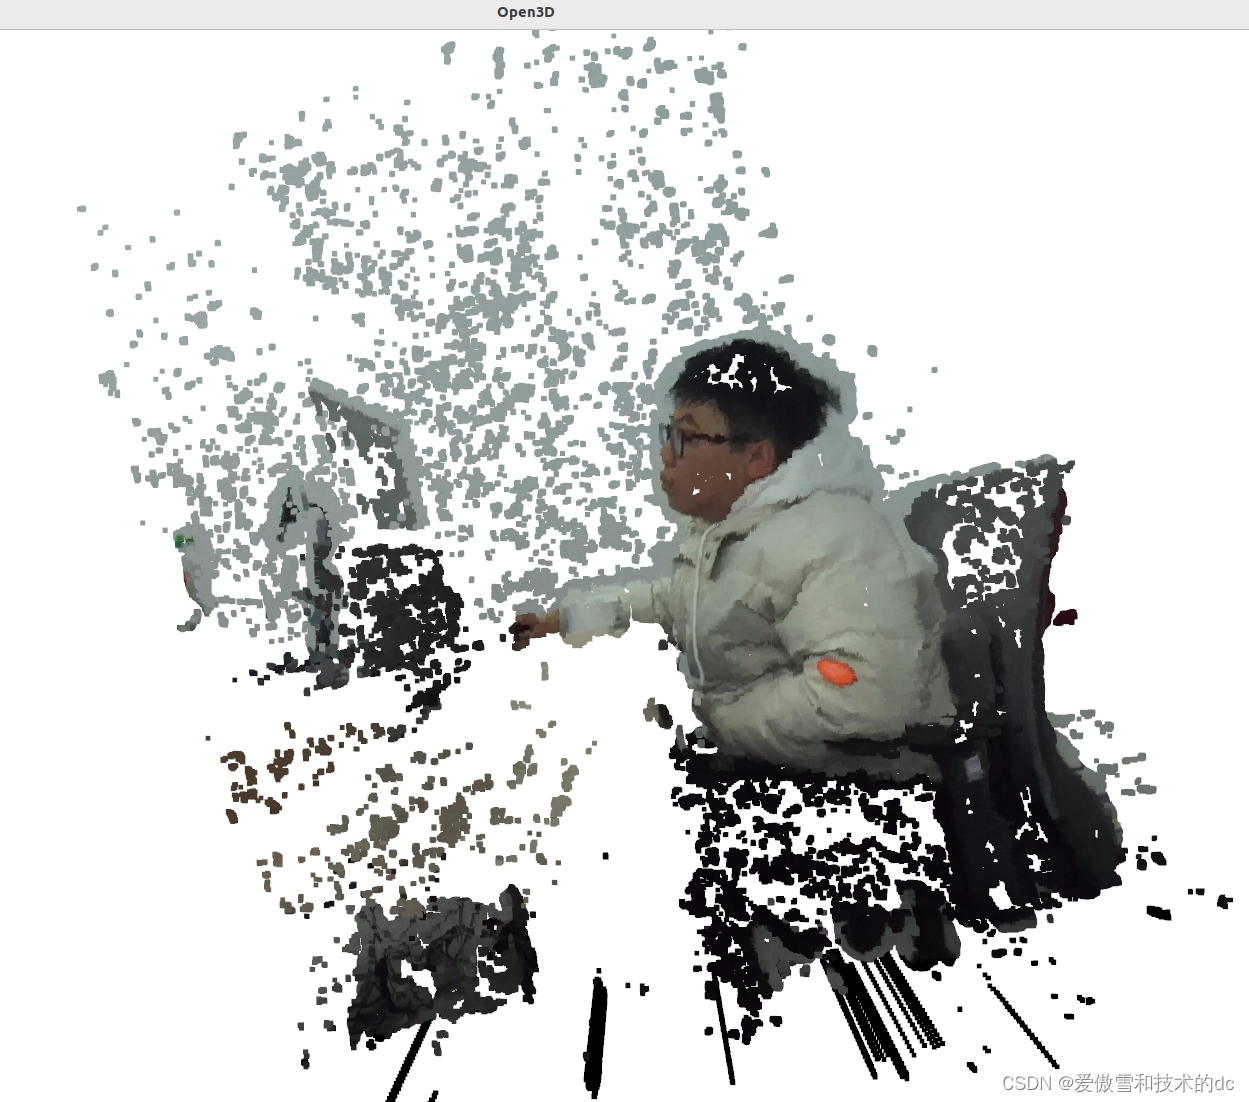
pcd = o3d.io.read_point_cloud(output_file)
o3d.visualization.draw_geometries([pcd])
cv2.waitKey(0)
### ######
# with open('point_cloud2.txt', 'w') as file:
# for point in output_points[:i]: # 假设 i 是有效数据的数量
# file.write(f"{point[0]} {point[1]} {point[2]} {point[3]} {point[4]} {point[5]}\n")
# try:
# points = np.loadtxt('point_cloud2.txt')
# if points.size > 0:
# # 创建 Open3D 点云对象
# pcd = o3d.geometry.PointCloud()
# # 设置点云的坐标
# pcd.points = o3d.utility.Vector3dVector(points[:, :3])
# # 设置点云的颜色
# pcd.colors = o3d.utility.Vector3dVector(points[:, 3:6] / 255.0)
# # 可视化点云
# o3d.visualization.draw_geometries([pcd])
# else:
# print("点云文件为空,无法加载点云。")
# except Exception as e:
# print(f"加载点云文件时出错: {e}")
效果图
 6.结语
6.结语
本人正在做毕设,需要得到高精度的点云(亚毫米)用于点云配准,参考立体视觉几何 (三)-CSDN博客,由于zed相机的焦距的焦距较短(2.1mm)深度不确定度过大,下一步考虑使用海康工业相机,亲们如果有这方面的见解欢迎交流!

有“AI”的1024 = 2048,欢迎大家加入2048 AI社区
更多推荐
 18
18 0
0- 0


 已为社区贡献9条内容

所有评论(0)