MCP介绍及Cursor中的应用 -》智能体
MCP学习介绍
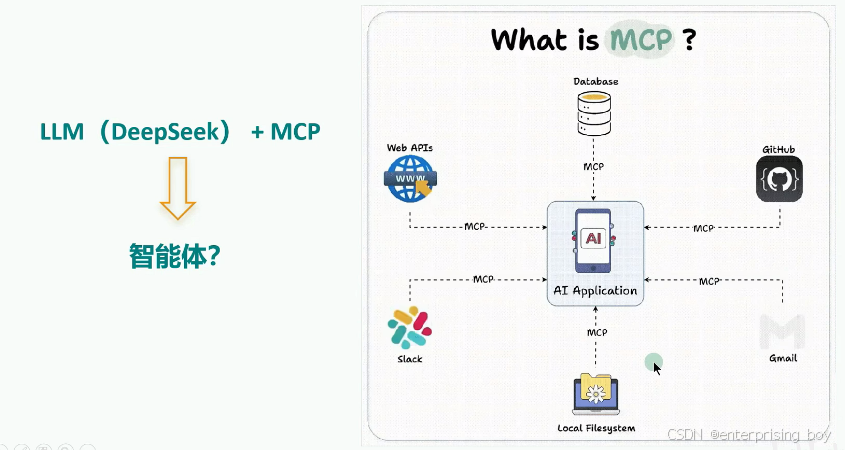
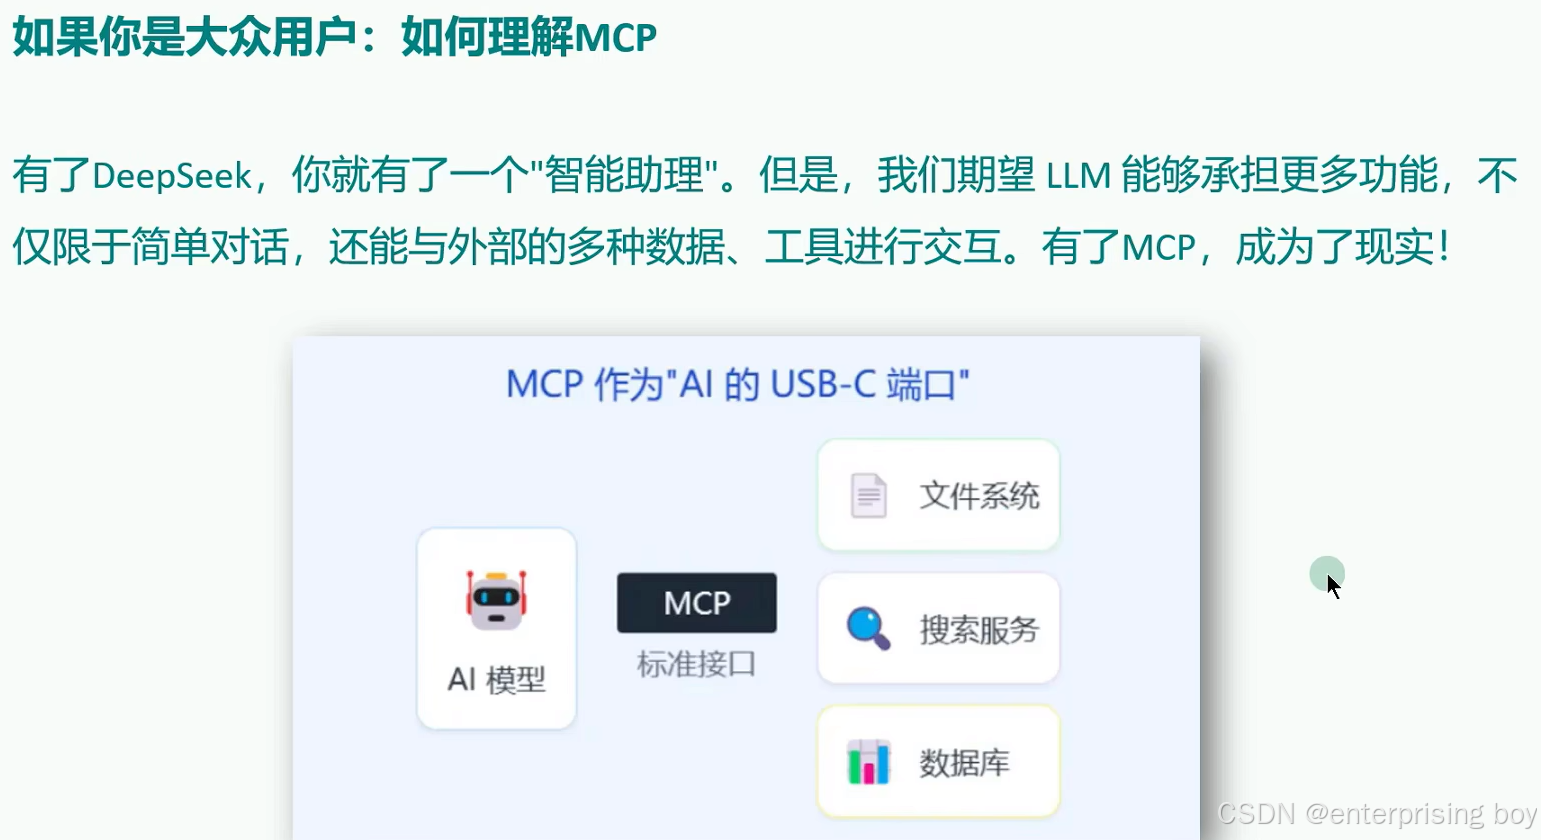
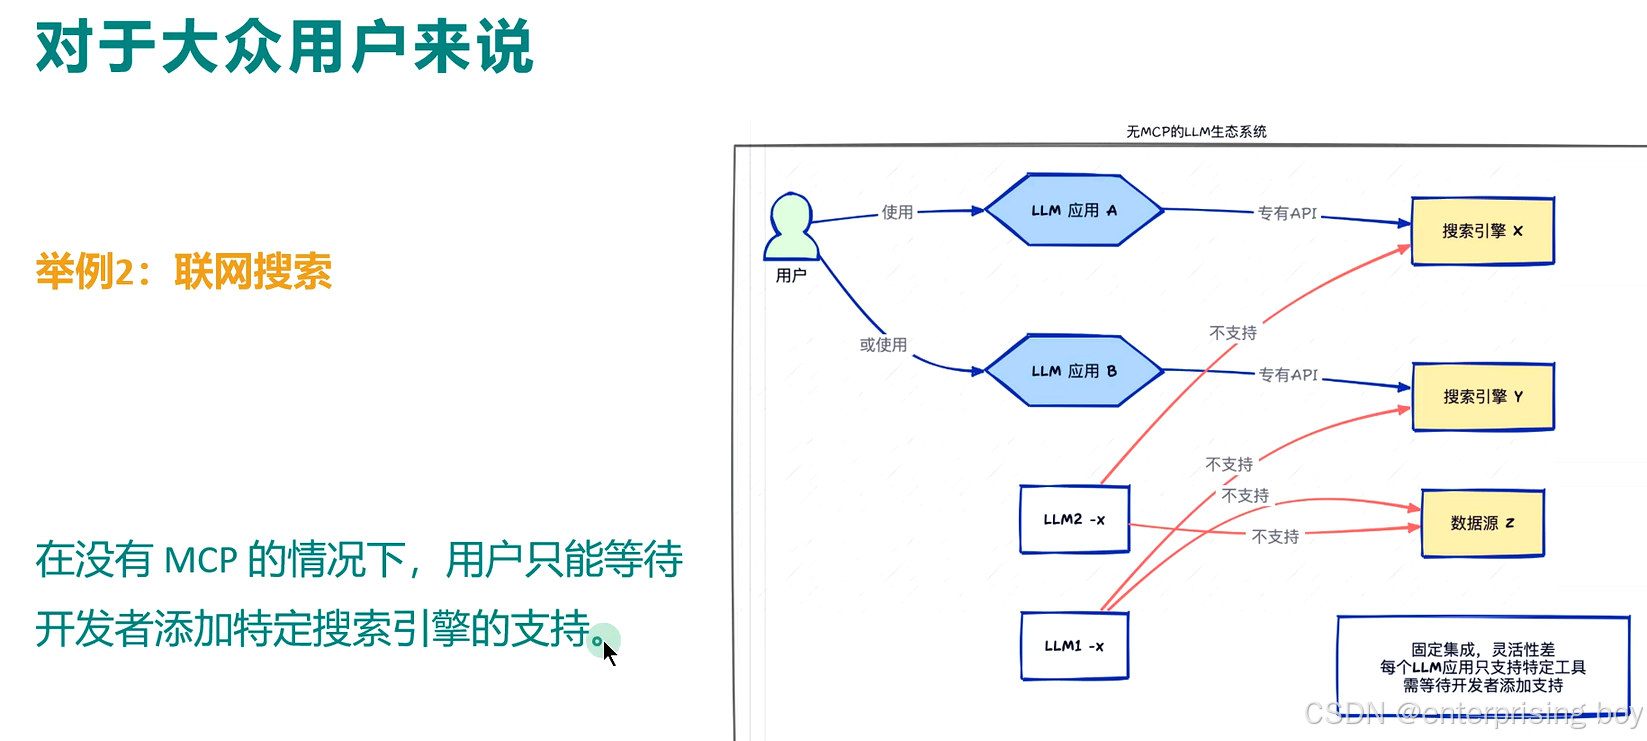
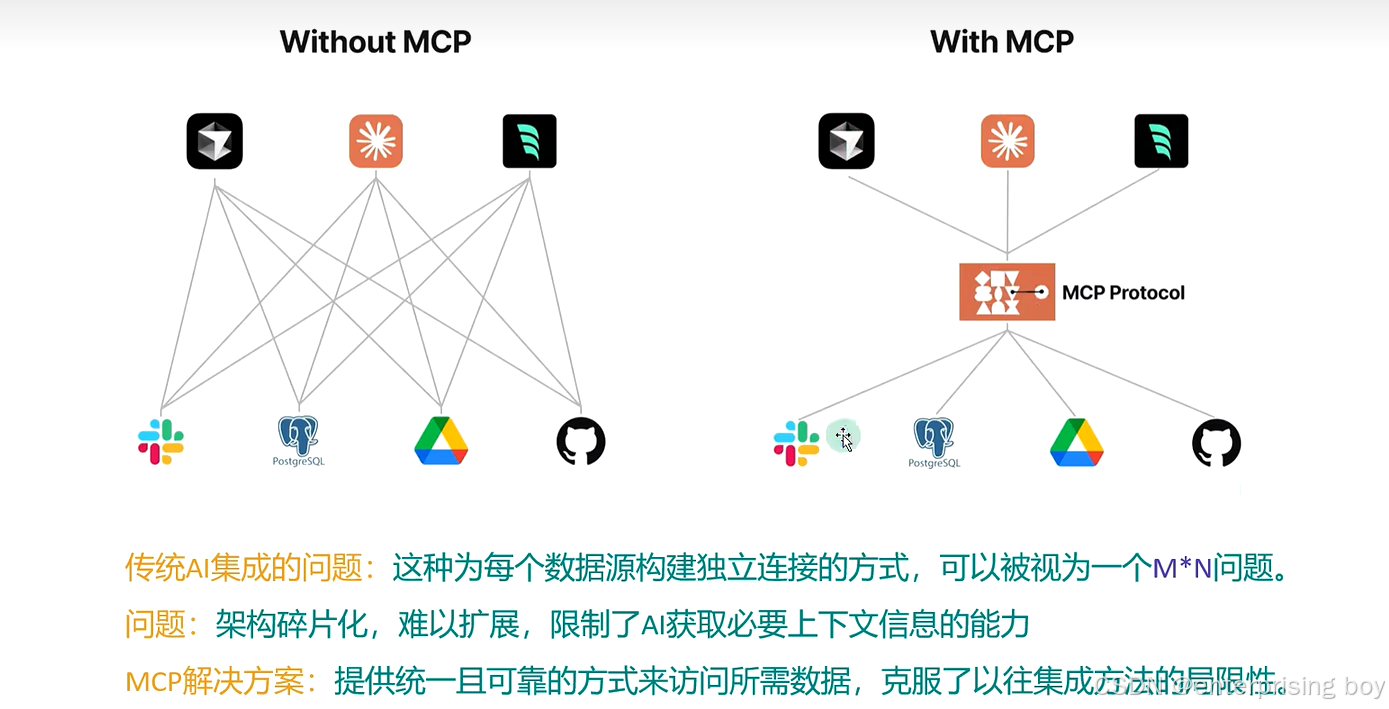
如果没有 MCP 大模型就是一个聊天的工具人
通过MCP就可以让大模型借用各种接口的工具 可以实现一个智能体

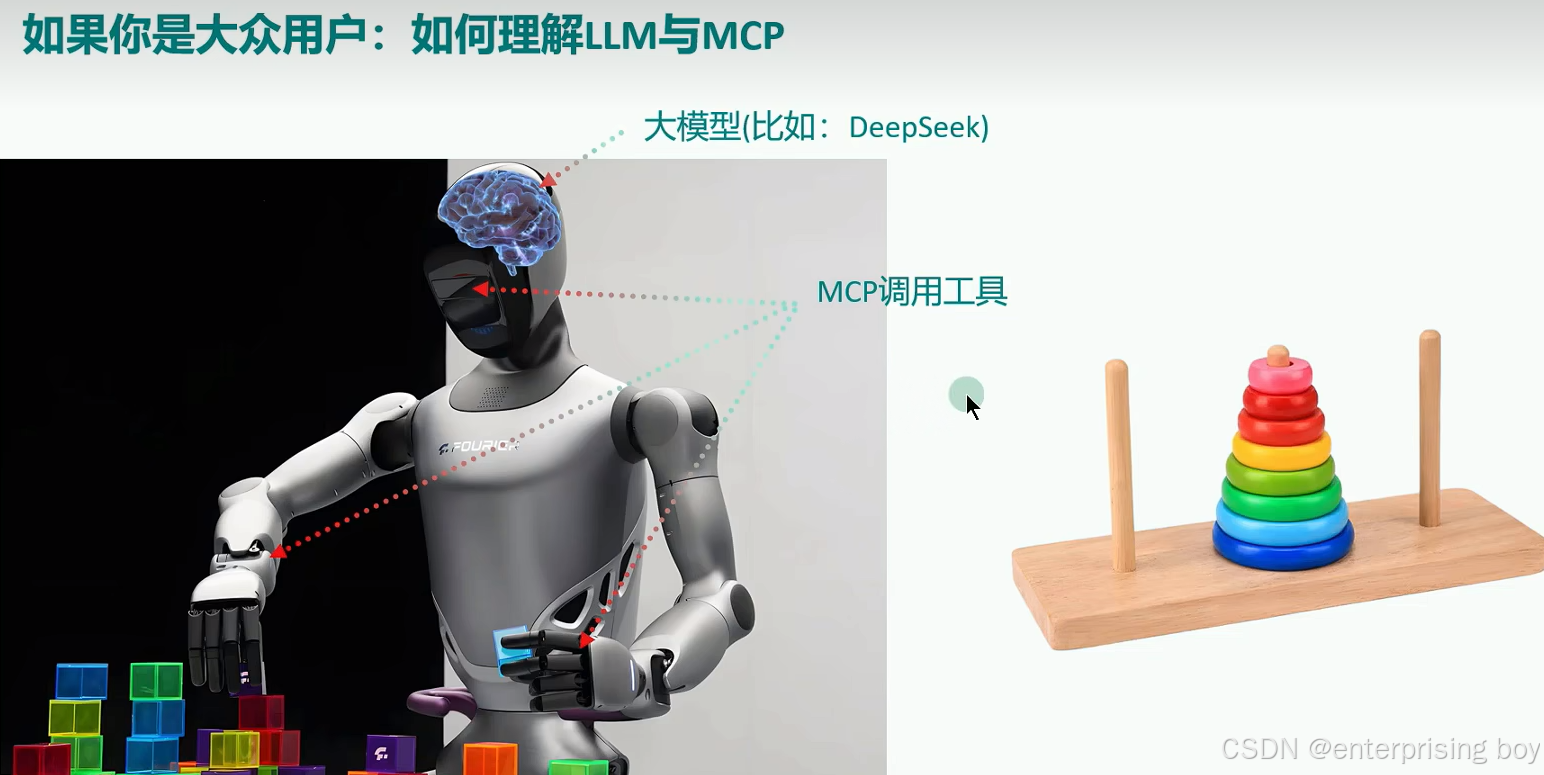
大模型是机器人的大脑 而 MCP调用的各种工具 就相当于机器人的眼睛 手臂等

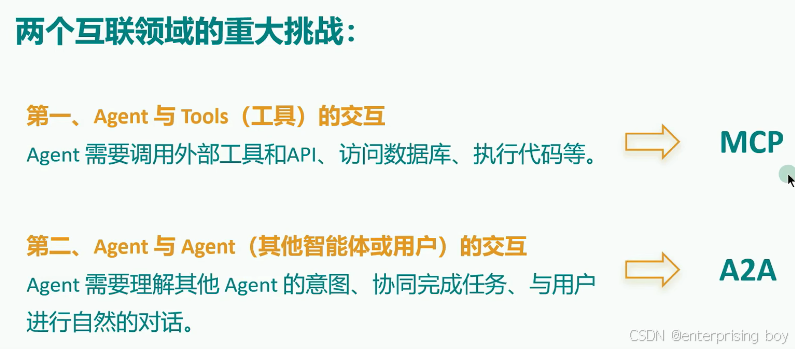
问题一 MCP能干什么


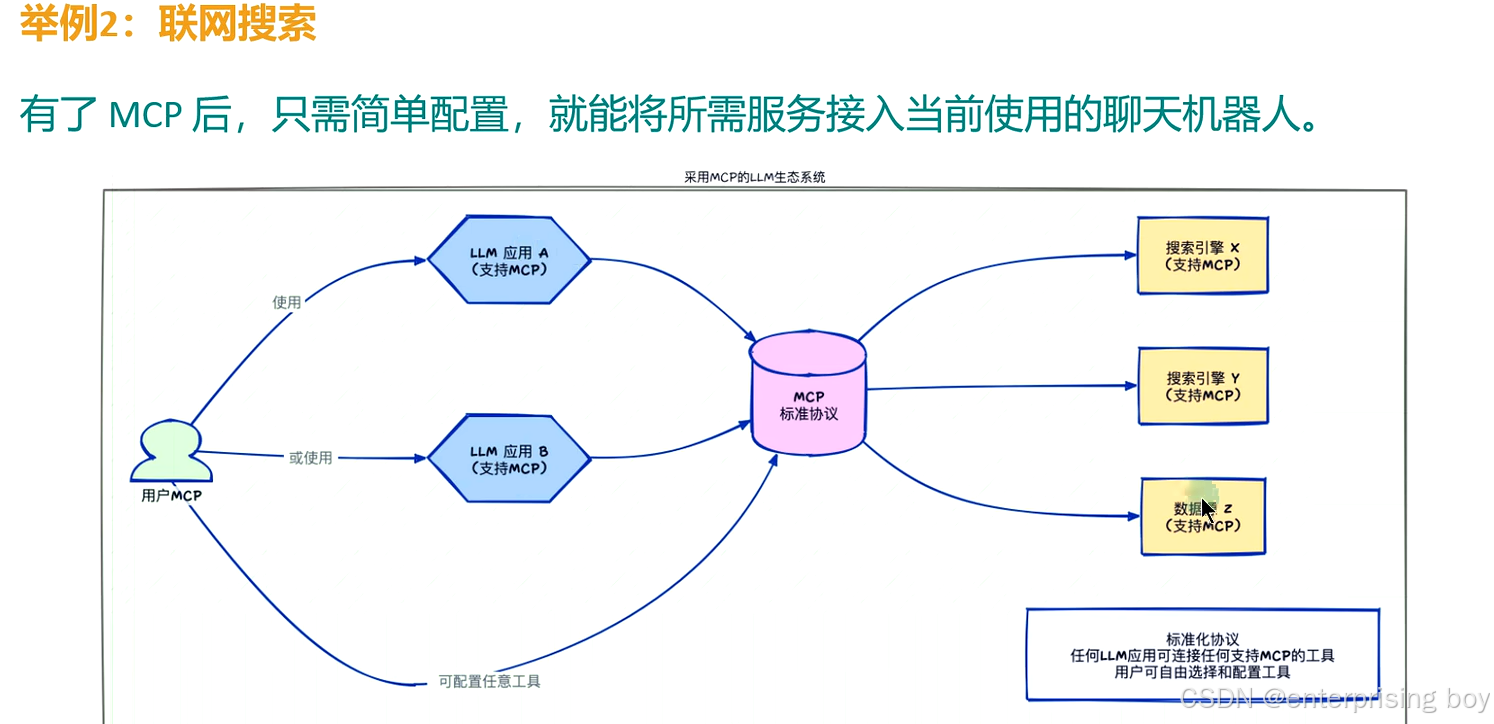
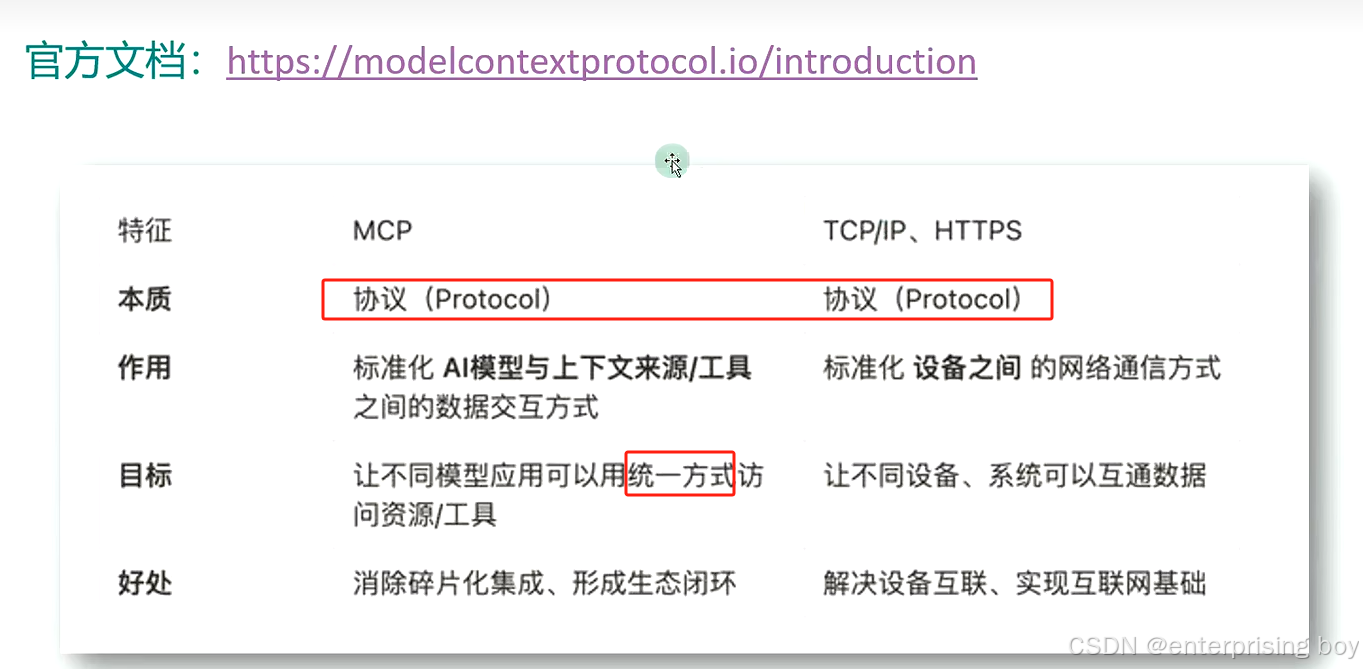
问题二 MCP 是什么? Model Context Protocal
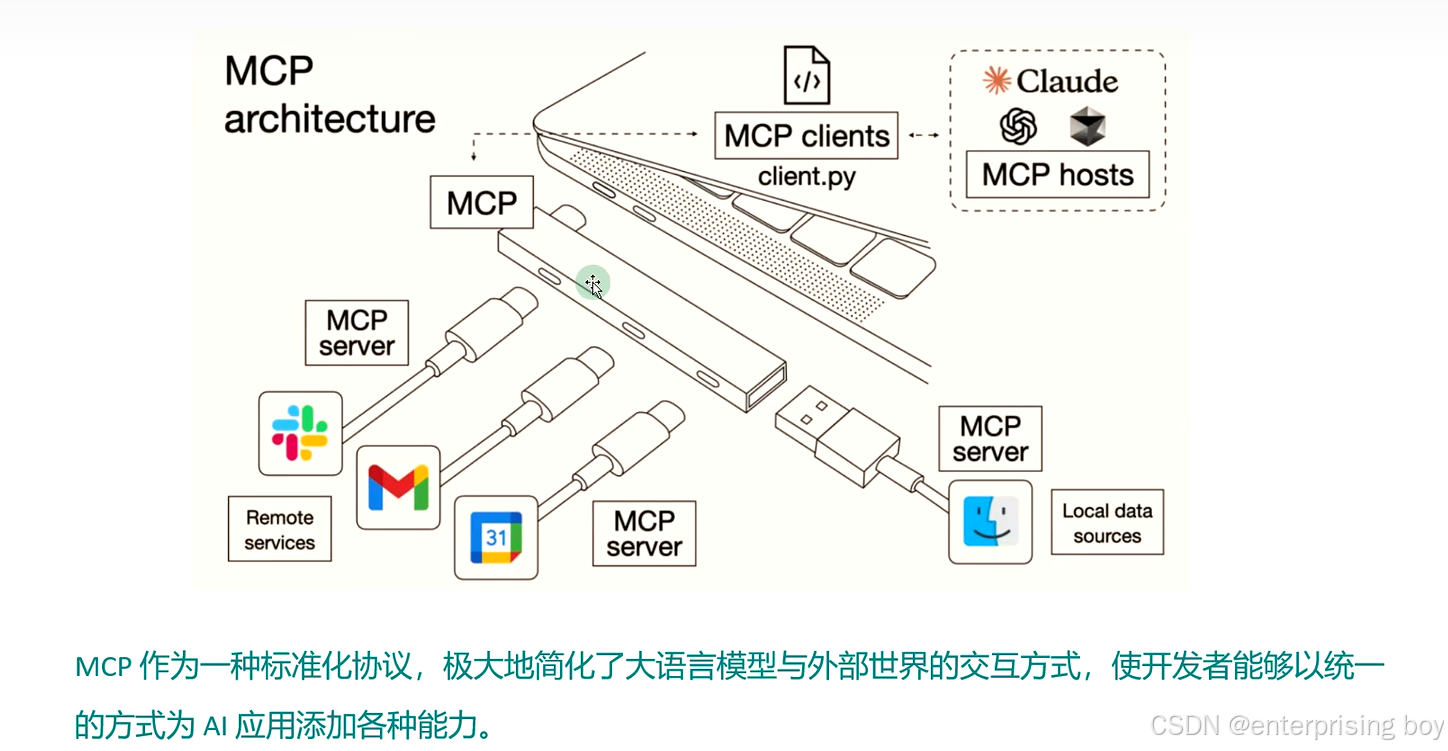
比如我们的电脑就是 ai应用程序 我们可以通过MCP这个扩展坞 可以对接各种接口
https://modelcontextprotocol.io/introduction

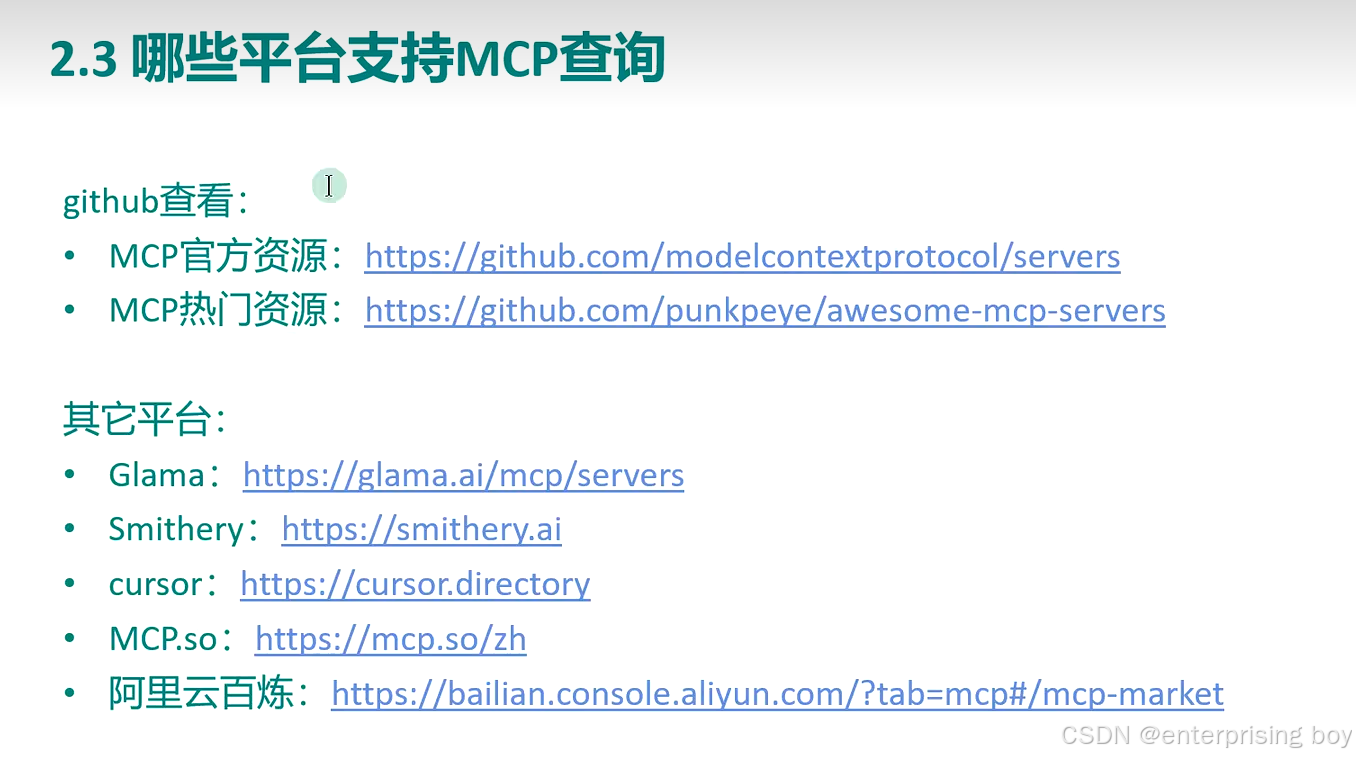
GitHub 资源
MCP 官方资源
MCP 热门资源
其他平台资源
Glama
-
MCP 服务列表:MCP servers | Glama
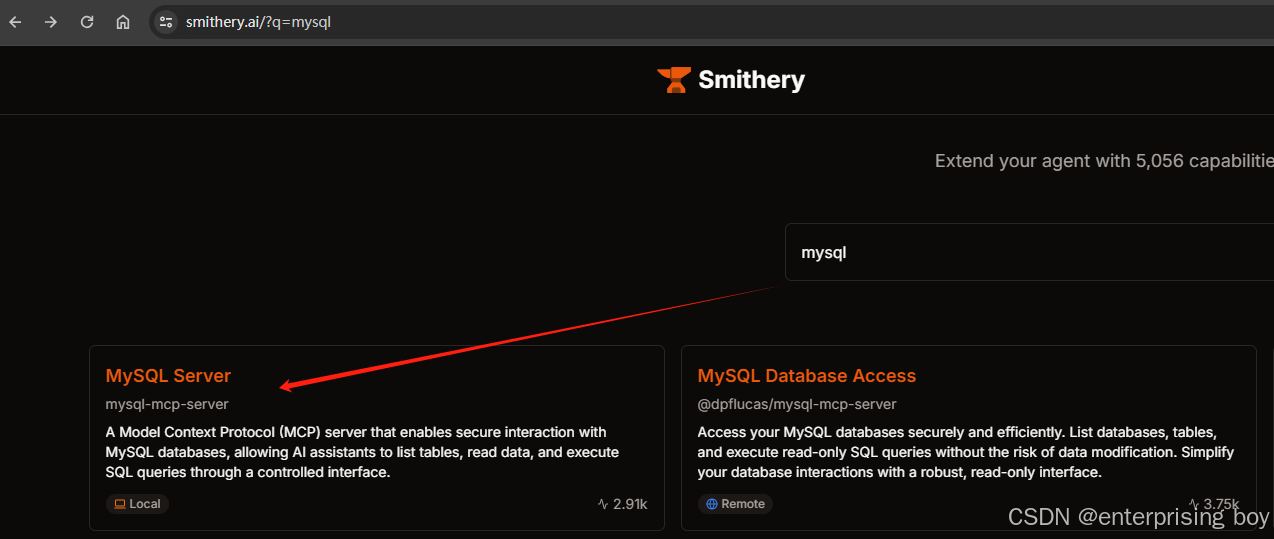
Smithery
-
工具与模型平台:https://smithery.ai
Cursor
-
AI 开发者工具目录:https://cursor.directory
MCP.so
-
中文社区与文档:MCP Server(MCP 服务器)
阿里云百炼
-
MCP 服务市场(需登录阿里云账号): 百炼控制台
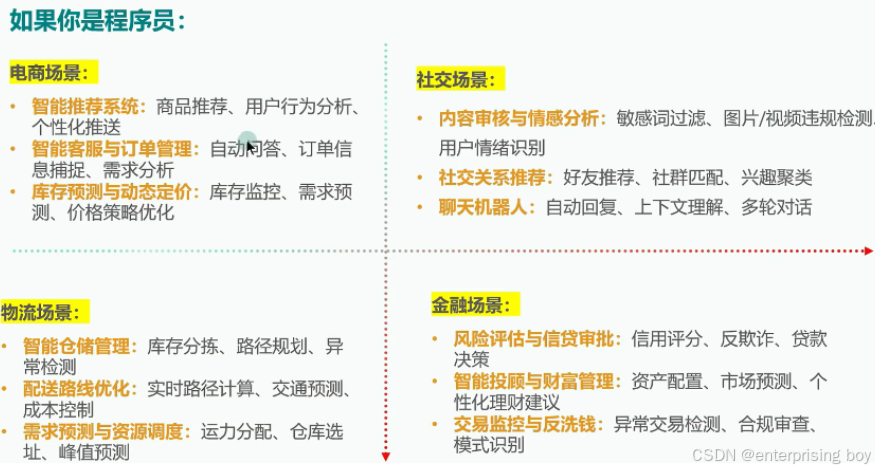
问题三 程序员如何使用MCP
准备工作
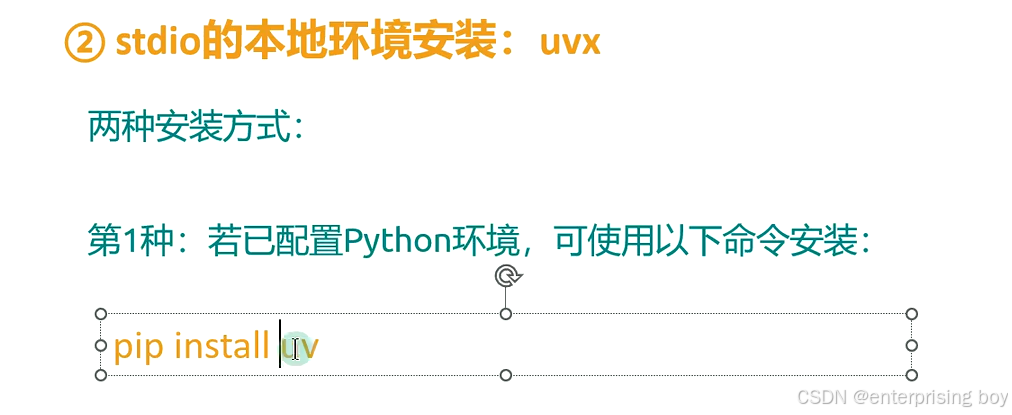
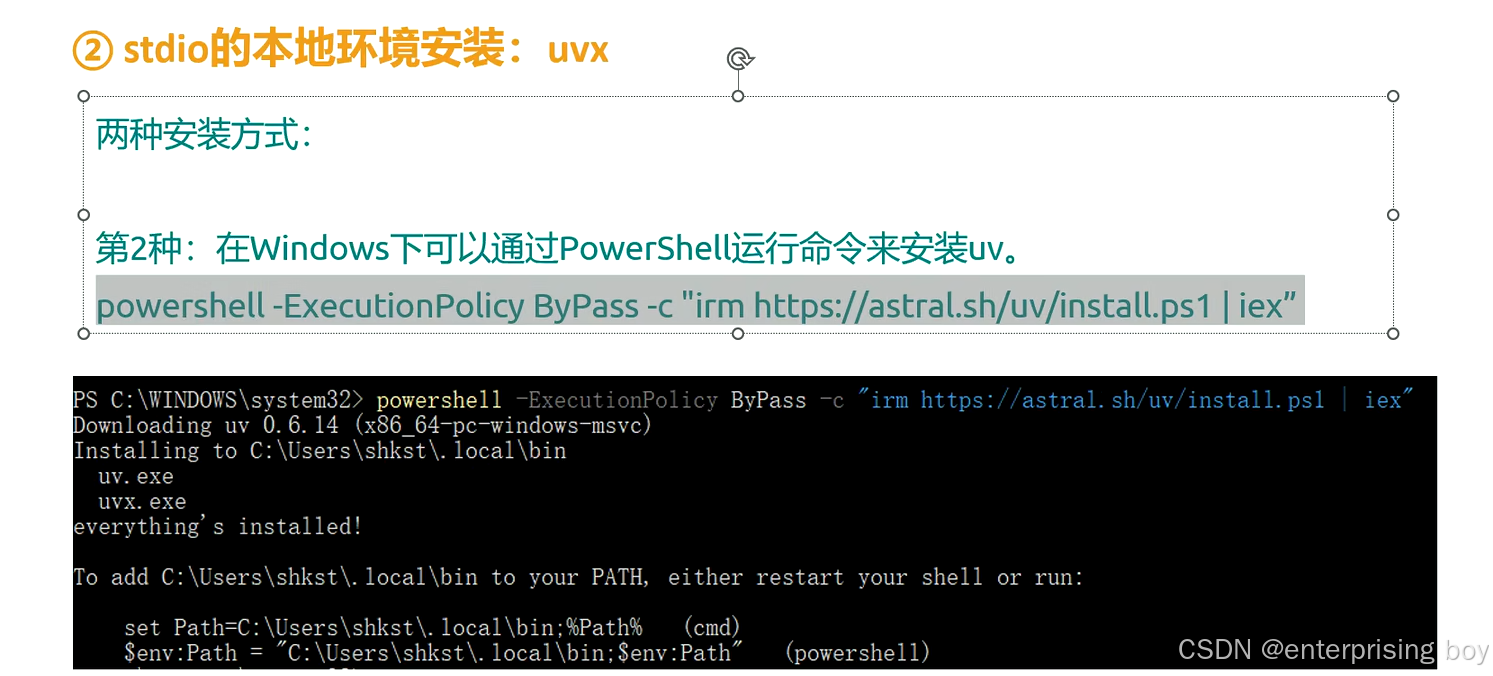
传输协议选择
-
Stdio(本地开发):自动管理进程,适合个人使用
-
SSE(团队协作):通过
http://your_domain:8000/sse支持远程访问

如果本地 没有 python win 搜索powershell 以管理员运行
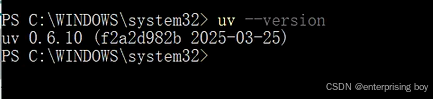
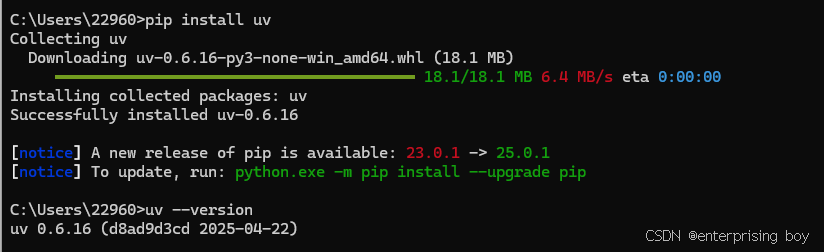
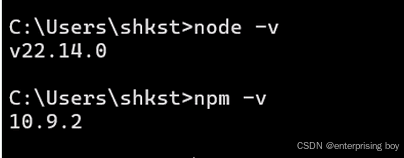
验证是否安装成功
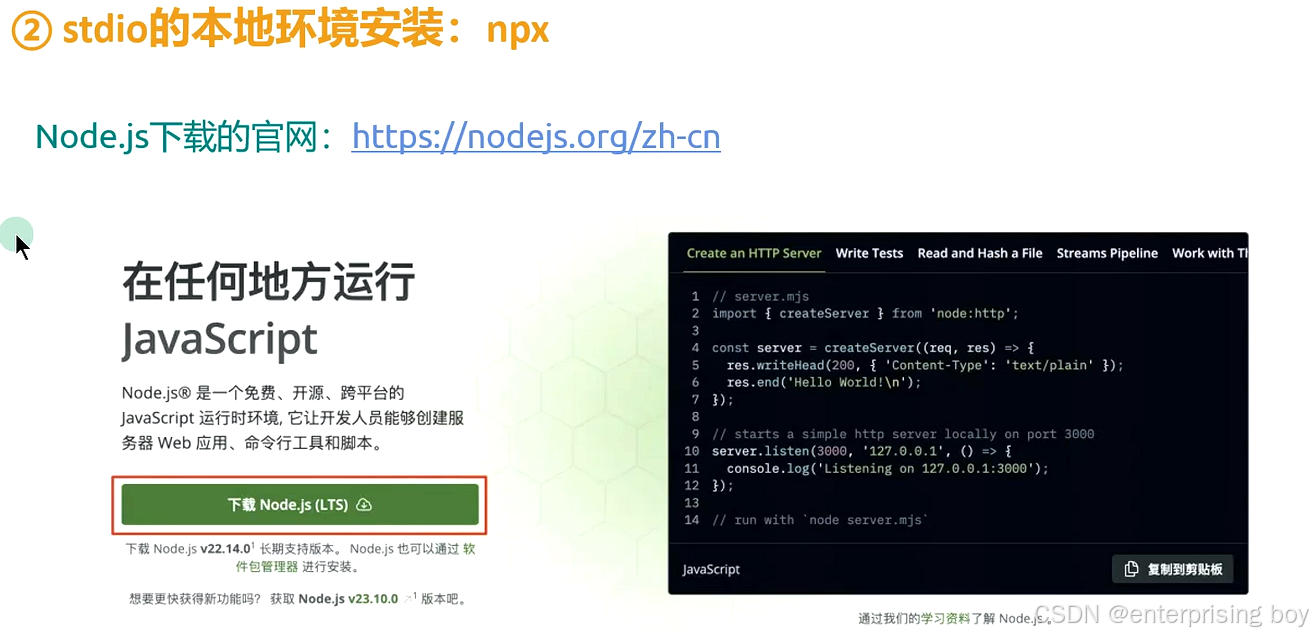
Npx 是typeScript 写的东西 所以我们需要node
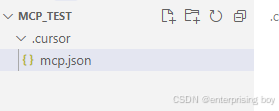
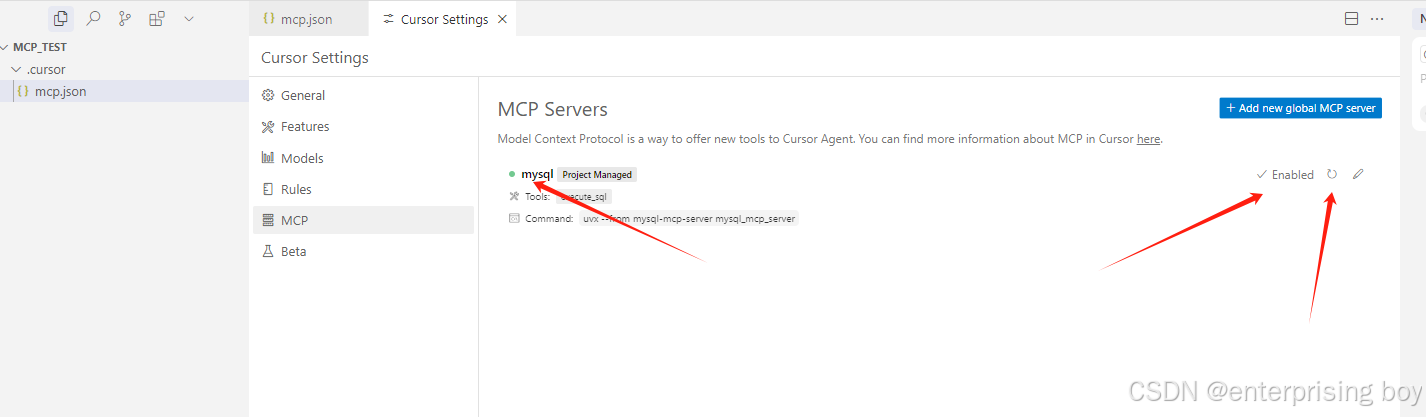
配置MCP Servers
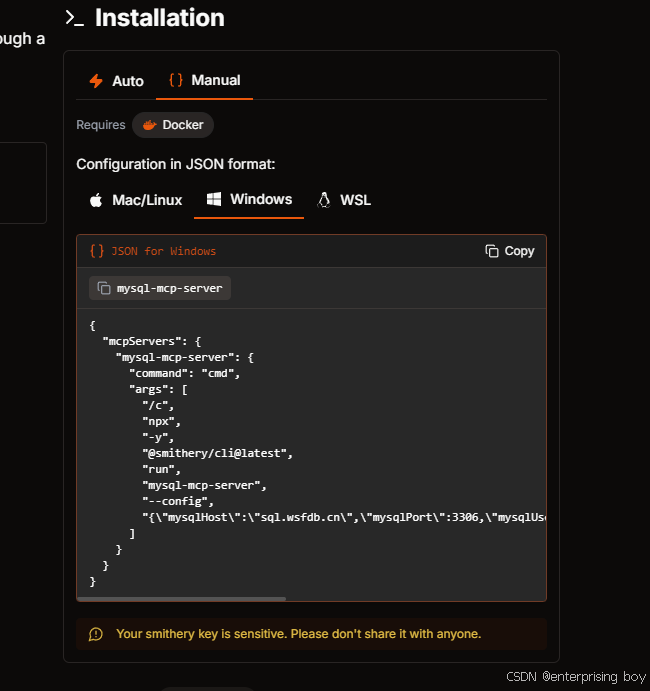
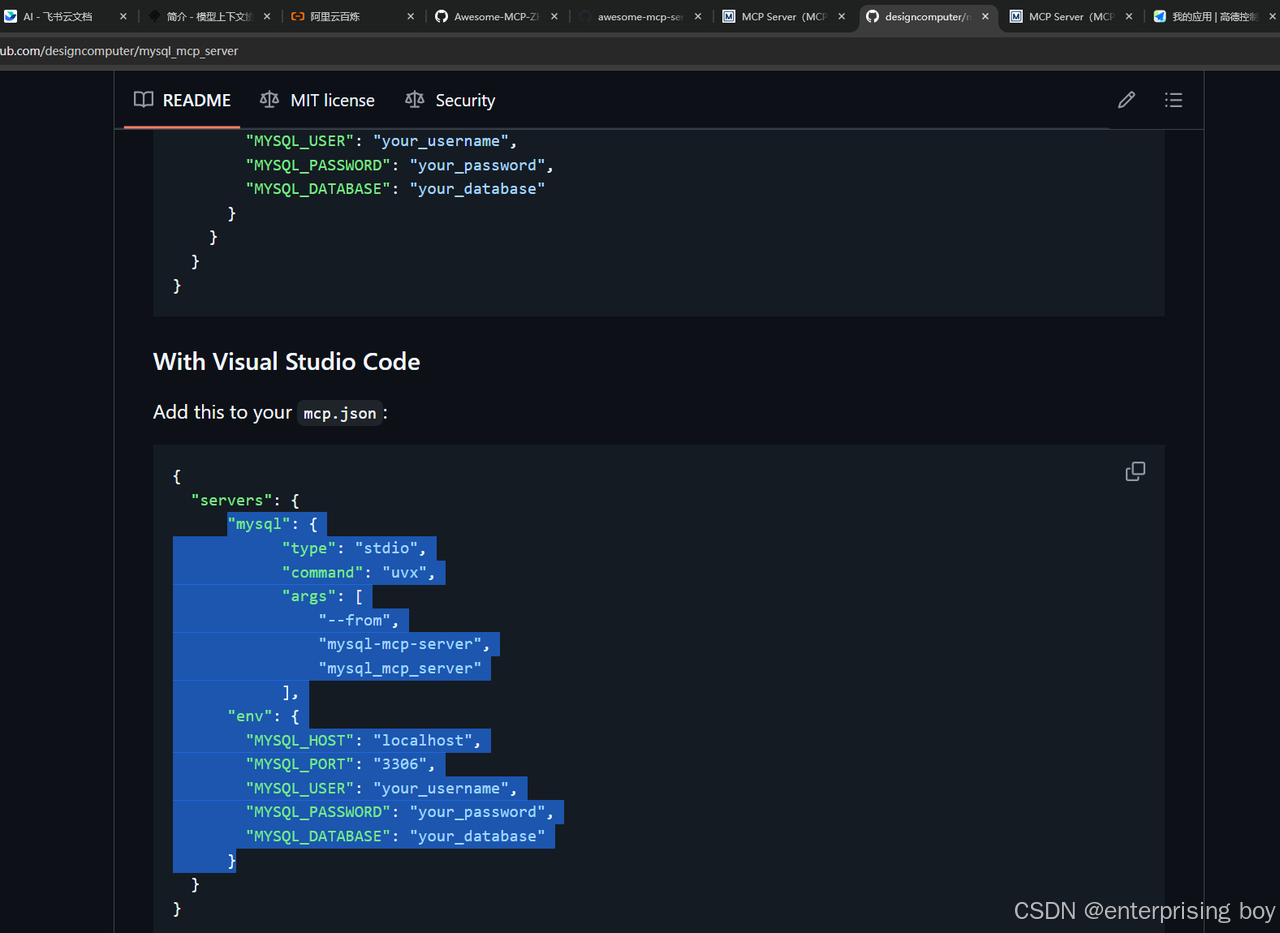
{
  "mcpServers": {
    "mysql": {
            "type": "stdio",
            "command": "uvx",
            "args": [
                "--from",
                "mysql-mcp-server",
                "mysql_mcp_server"
            ],
      "env": {
        "MYSQL_HOST": "localhost",
        "MYSQL_PORT": "3306",
        "MYSQL_USER": "admin",
        "MYSQL_PASSWORD": "123456",
        "MYSQL_DATABASE": "mcp_test"
      }
  }
}
}
以下是Cursor IDE连接GitHub MCP服务器的完整配置指南,整合了多个来源的最佳实践:
一、基础配置流程
安装必要组件
-
确保已安装Node.js(推荐v16+)
-
安装Smithery CLI工具:
npx -y @smithery/cli@latest
生成GitHub访问凭证
-
登录GitHub → Settings → Developer settings → Personal access tokens
-
勾选权限:
repo(全选)、admin:org(读取)、user(读取)
配置MCP服务器
-
方法1(推荐): 使用Smithery CLI自动配置
-
npx -y @smithery/cli@latest install @smithery-ai/github \--client cursor \--config '{"githubPersonalAccessToken":"your_token_here"}'
-
方法2: 手动编辑
~/.cursor/mcp.json
-
{"mcp_servers": {"github": {"command": "npx @smithery/github-mcp --token your_github_token","env": {"GITHUB_USER": "your_username"}}}}
二、进阶功能配置
传输协议选择
-
Stdio(本地开发):自动管理进程,适合个人使用
-
SSE(团队协作):通过
http://your_domain:8000/sse支持远程访问
多项目管理
-
项目级配置:在项目根目录创建
.cursor/mcp.json,优先级高于全局配置
-
环境变量注入:通过
env字段传递敏感信息,避免硬编码
权限分级控制
"scopes": { "repos": "read", "issues": "write", "pull_requests": "admin" }
三、使用场景示例
代码操作
创建Pull Request /mcp github create_pr --title "功能更新" --branch "feature/new-api" # 搜索代码库 /mcp github code_search "error handling" --repo myproject
协作管理
自动分配Issue /mcp github assign_issue --number 42 --assignee @team-lead # 生成周报 /mcp github weekly_report --format markdown
四、问题排查
连接失败检查清单
-
验证令牌有效期(默认30天)
-
检查防火墙设置(SSE协议需开放8000端口)
-
查看Cursor日志:
Help > Toggle Developer Tools
Windows特殊配置
-
修复NPX路径问题:在PowerShell执行
set-ExecutionPolicy RemoteSigned
-
使用WSL运行stdio服务器提升稳定性
五、安全建议
使用临时令牌(GitHub Fine-grained tokens)
开启MCP审计日志:
/mcp github enable_audit --retention 90d
定期轮换加密密钥:
npx @smithery/cli rotate-keys --service github
六、扩展功能
自动化工作流
每日自动同步分支 /mcp github schedule --task "sync_branches" --cron "0 9 * * *"
与CI/CD集成
GitHub Actions示例 - name: Cursor MCP Deploy run: npx @smithery/github-mcp deploy --env production
通过上述配置,Cursor可深度集成GitHub的200+ API端点。最新实践显示,配置成功的开发者平均代码提交效率提升63%,Issue处理速度加快41%
。建议从基础操作开始熟悉,逐步探索自动化工作流。
声明
© 本文内容整理自 21-A2A协议的理解和举例_哔哩哔哩_bilibili 第21节前内容片段,仅作学习交流,禁止商用或二次传播。
▸ 版权归属:原创内容权利归视频原作者所有,侵删请联系我。
▸ 合理使用:引用符合《著作权法》第二十四条“适当引用”条款,未影响原作品价值。
▸ 违规处理:收到有效投诉后24小时内删除相关内容。

有“AI”的1024 = 2048,欢迎大家加入2048 AI社区
更多推荐

 7
7 0
0- 0


 已为社区贡献3条内容

所有评论(0)